
Make A Reindeer Die Coloring Tutorial
Posted by DESIGN TEAM

Happy Tuesday everyone! I received a lot of compliments and inquiries on how I colored the Make A Reindeer Die from C.C. Designs so I created a step-by-step coloring tutorial to guide you through the process. I hope this helps you color your own Reindeer die-cut. I'm going to focus this tutorial on coloring the main body of the reindeer with Copic Markers. Here we go!
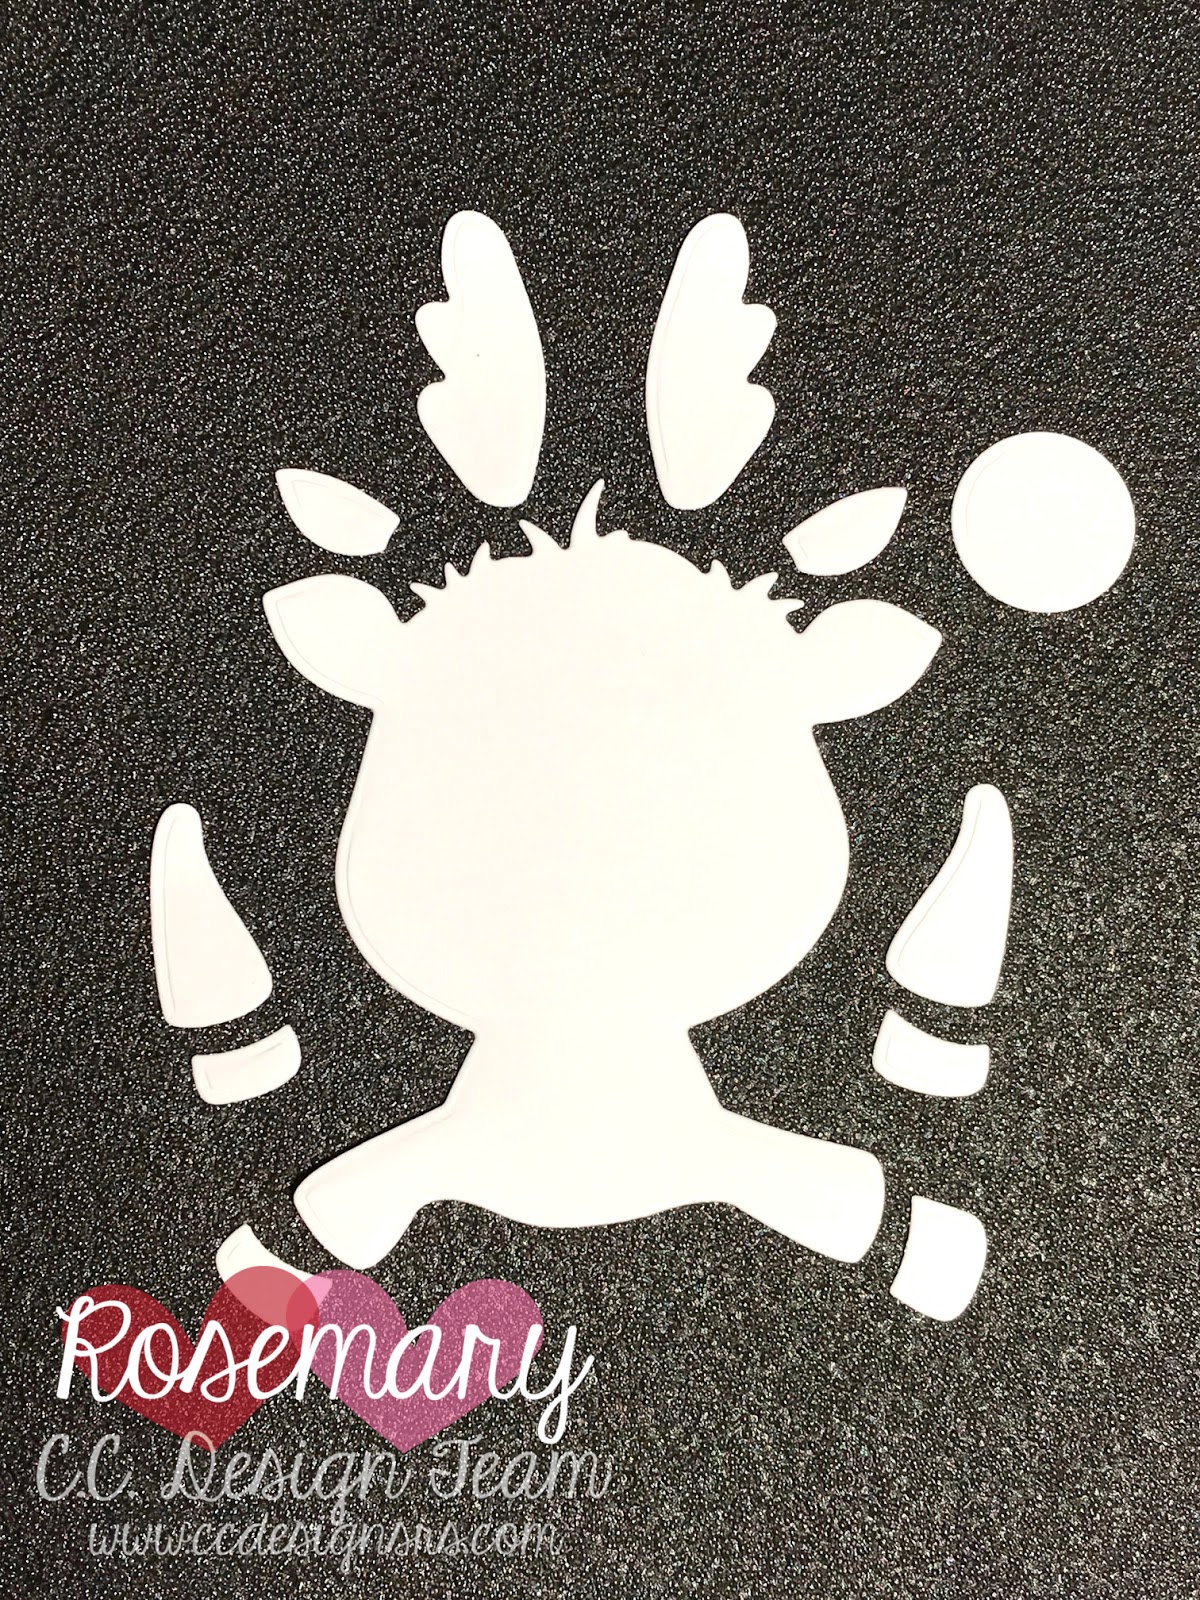
Step 1: I cut all the pieces of the die from Xpress-It Blending Card.
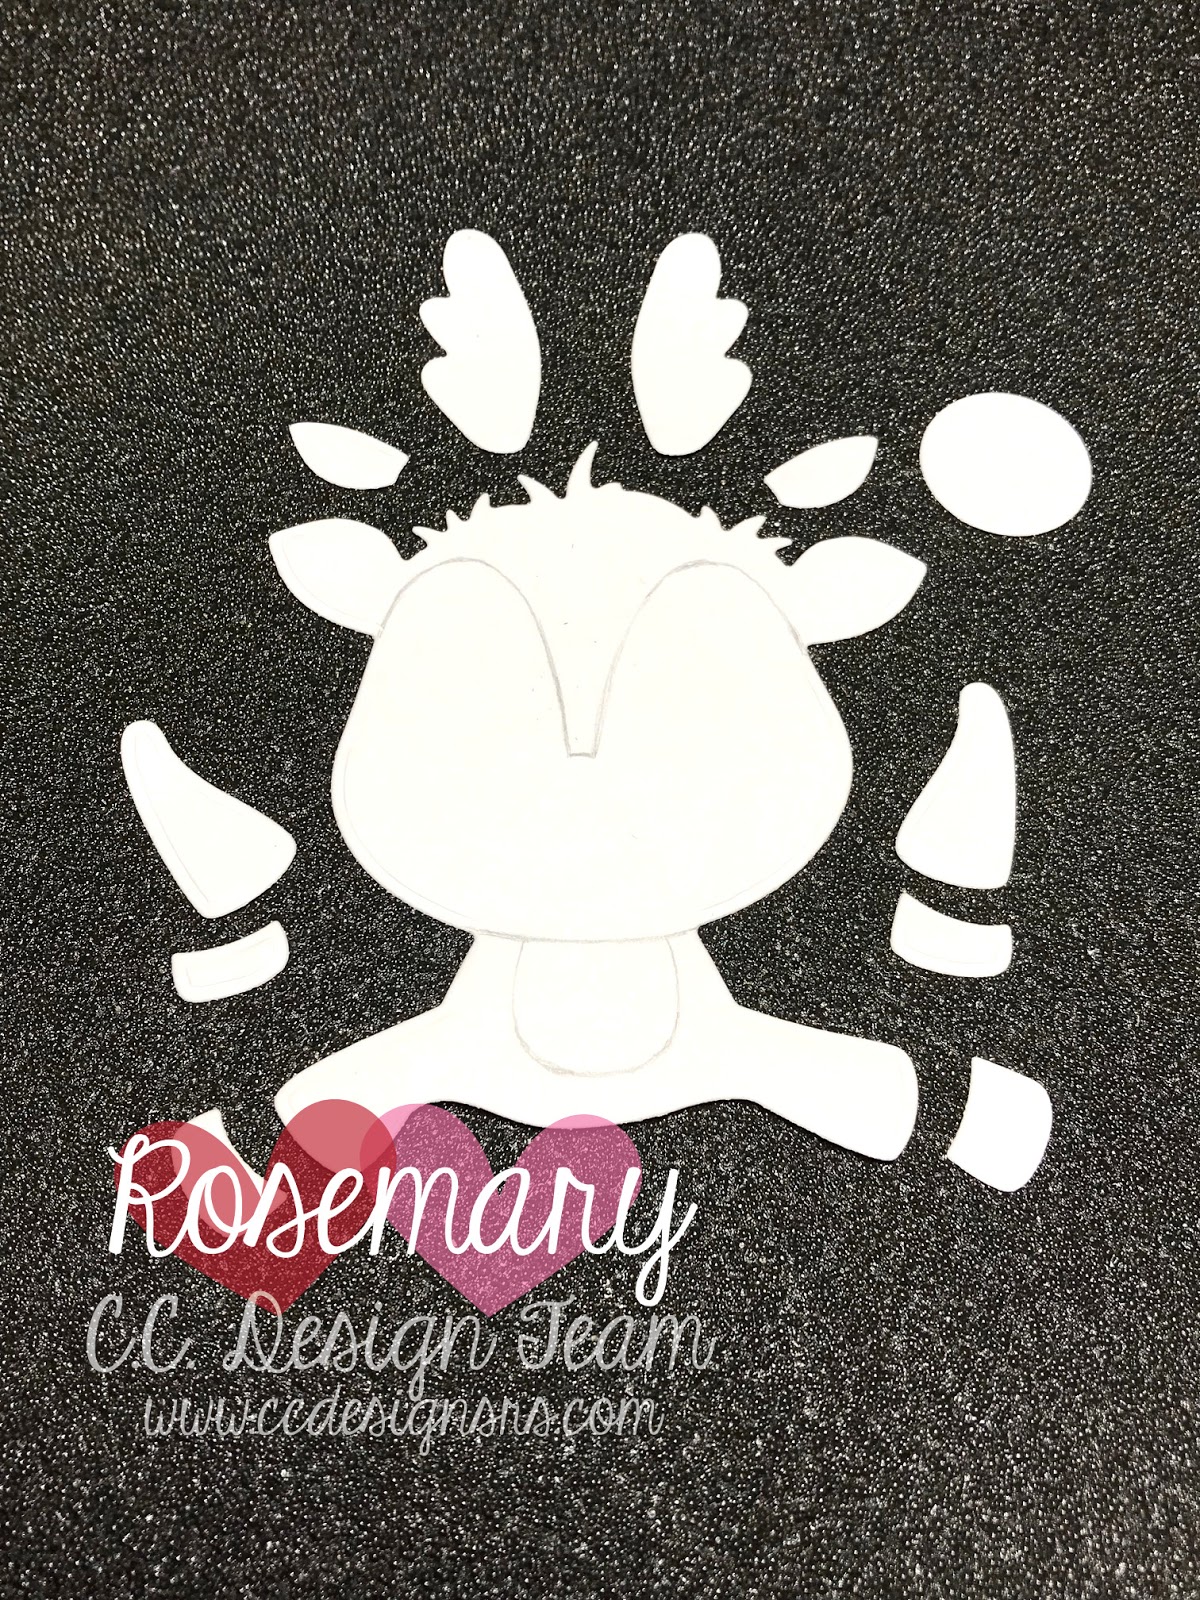
Step 2: I used a pencil to draw in the areas of the face and body that I'm going to color lighter.
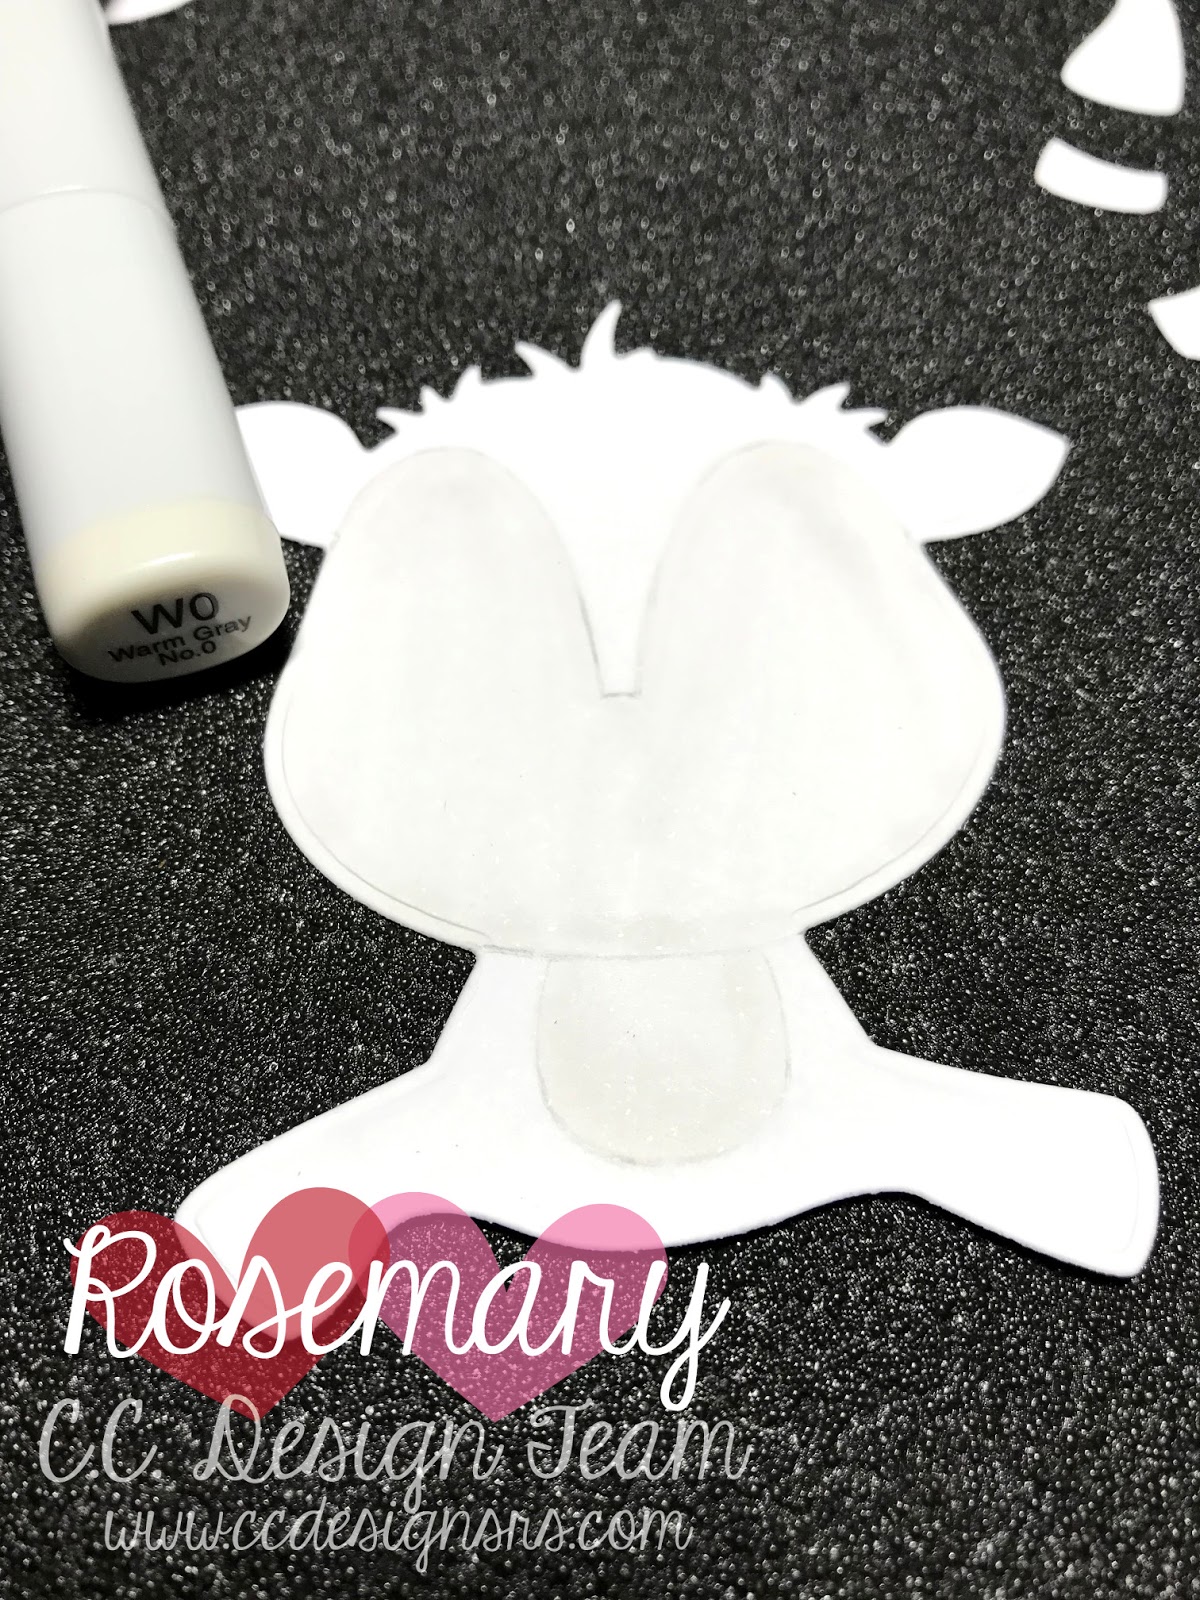
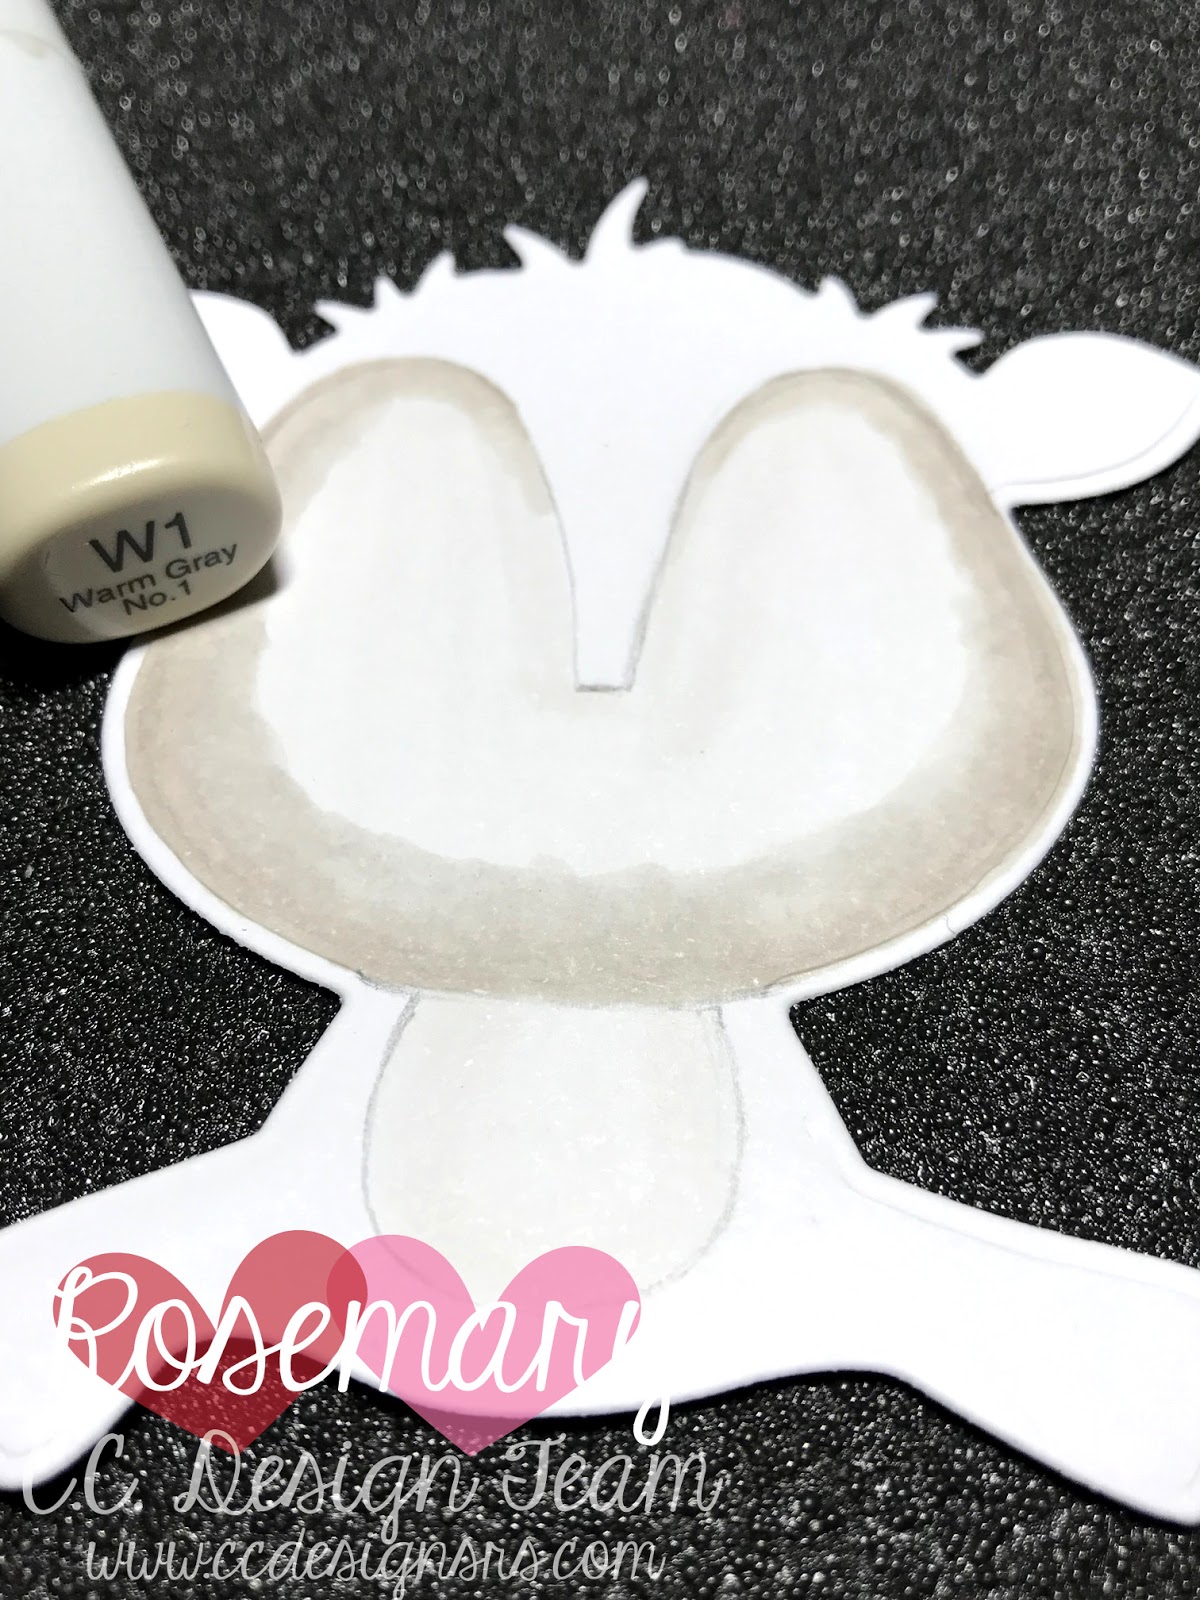
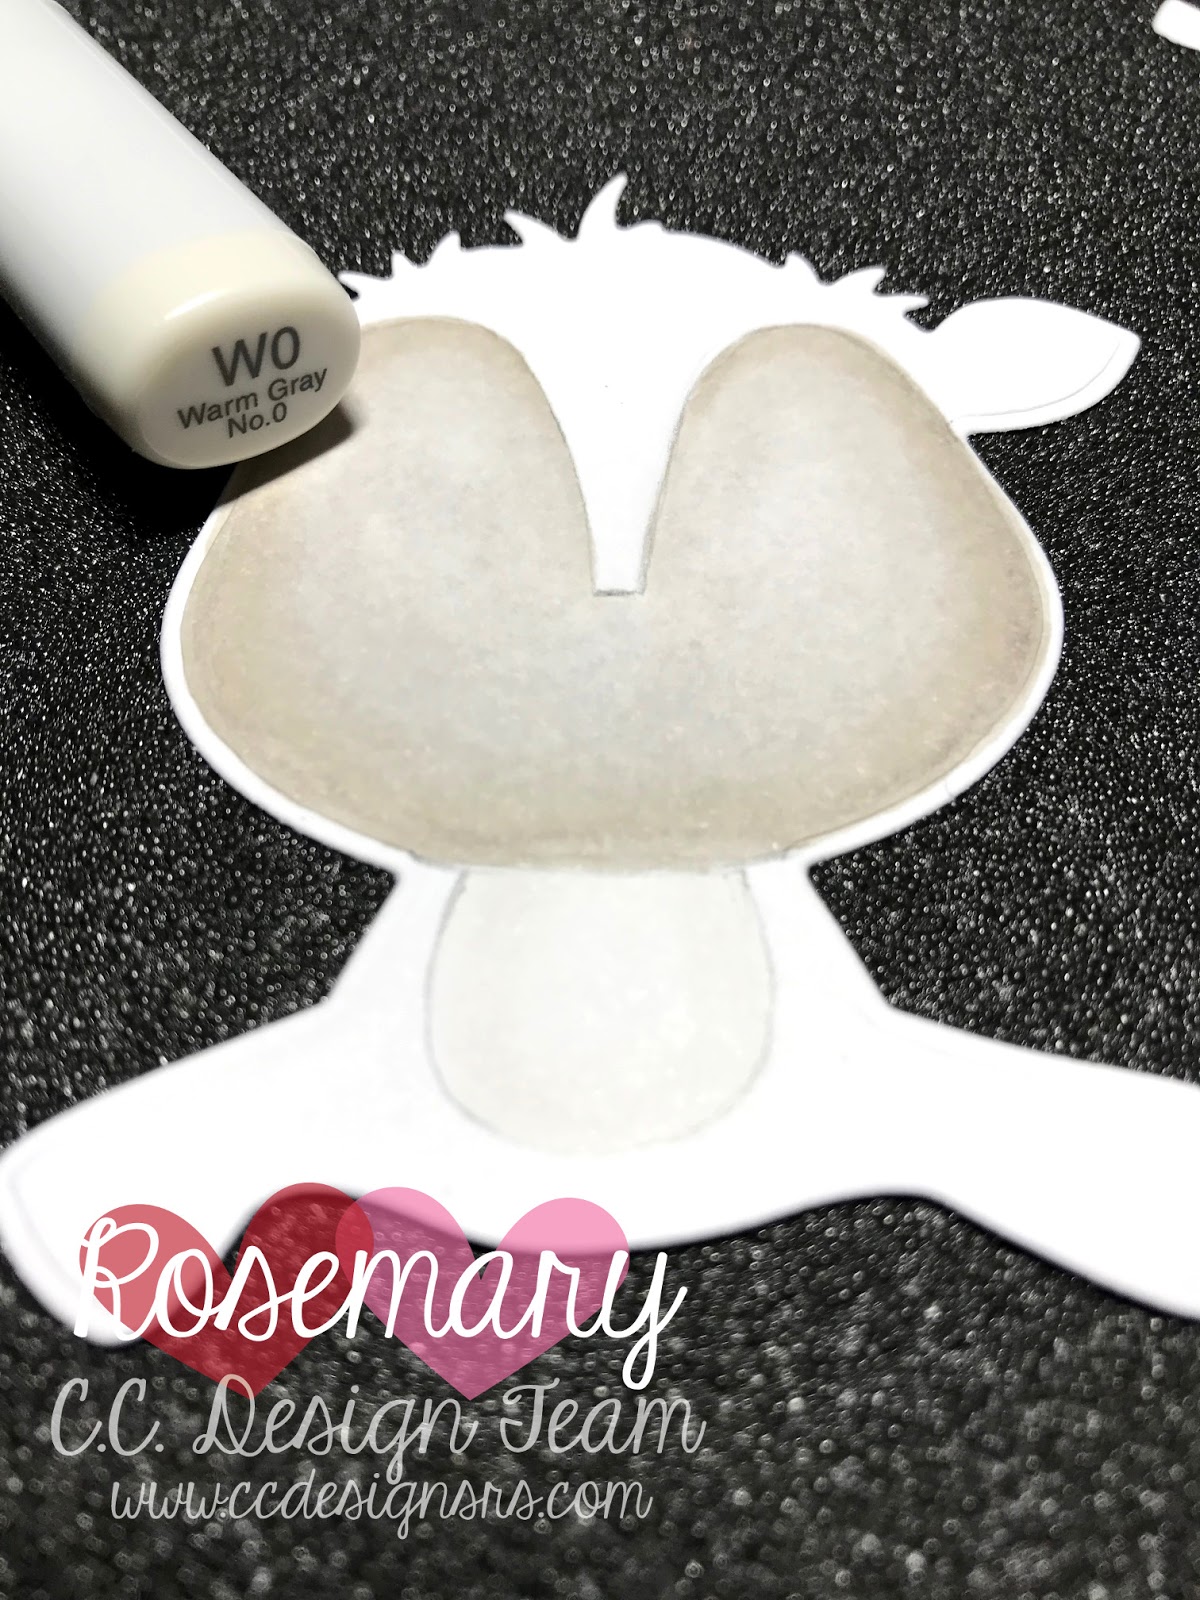
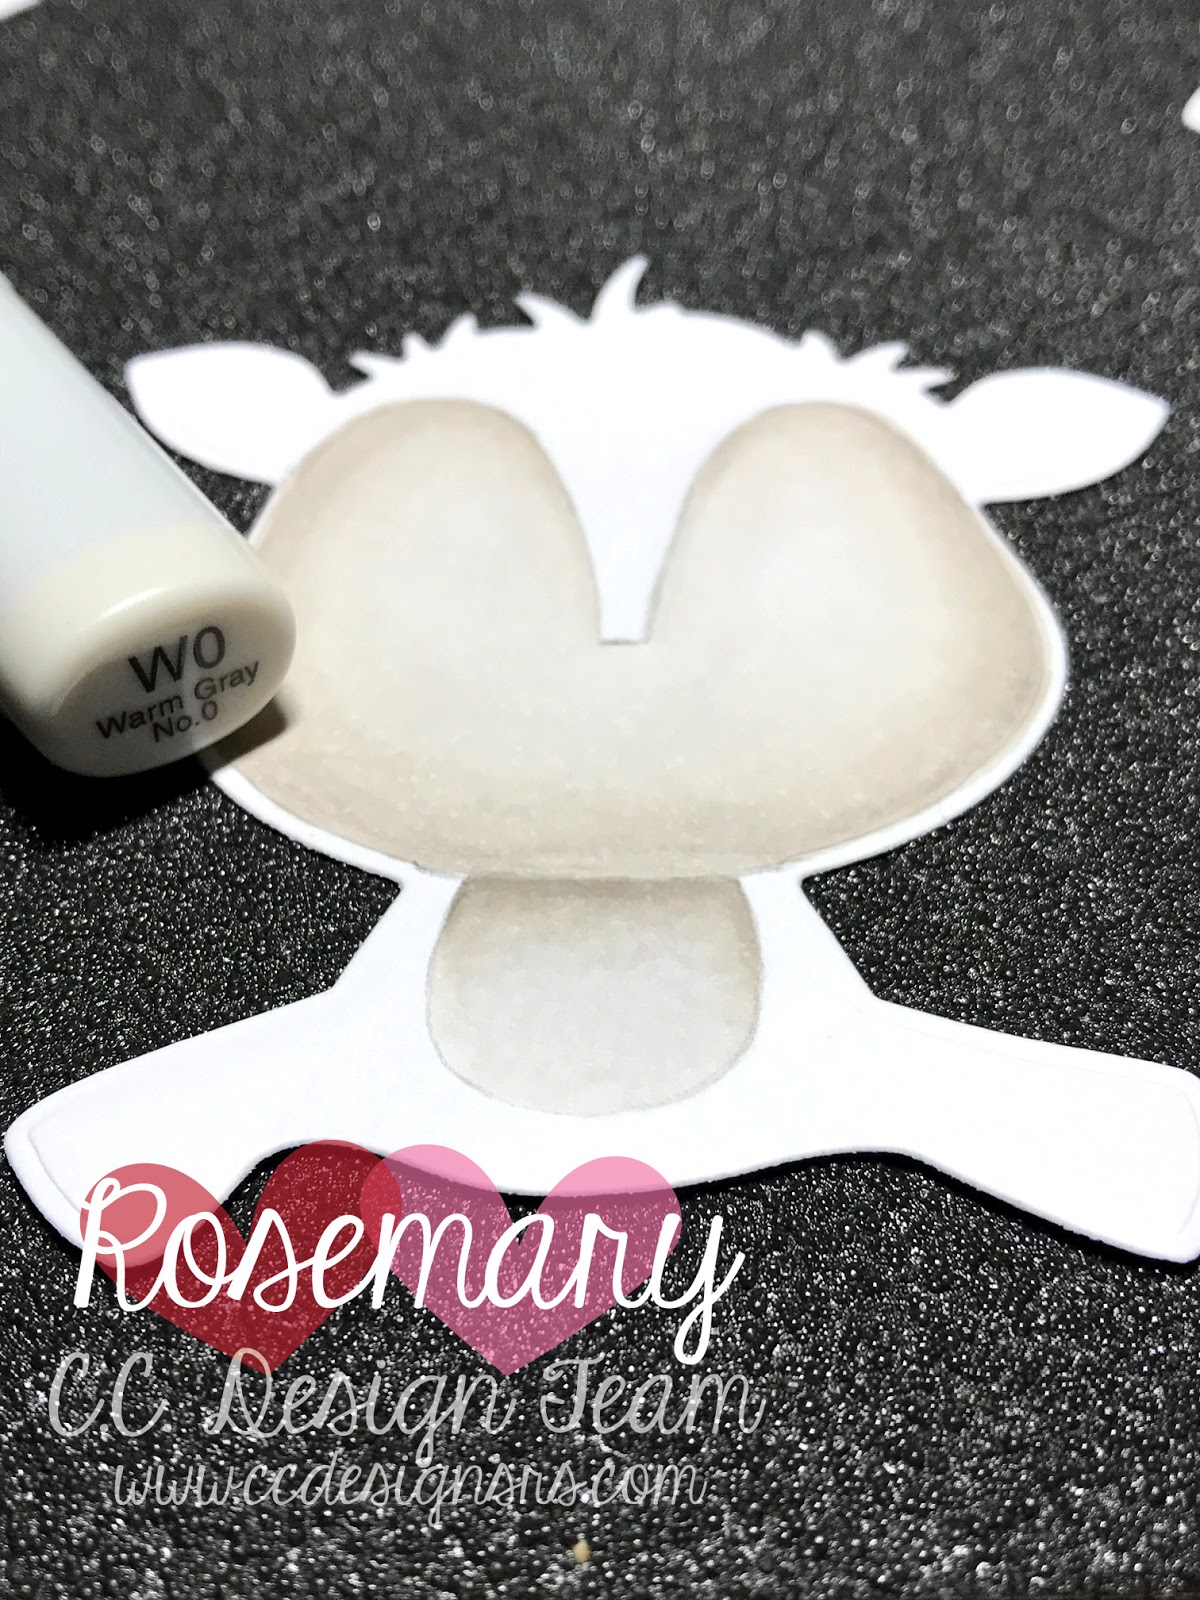
Step 3: I used W0 to color in the first layer of color on the face and stomach.
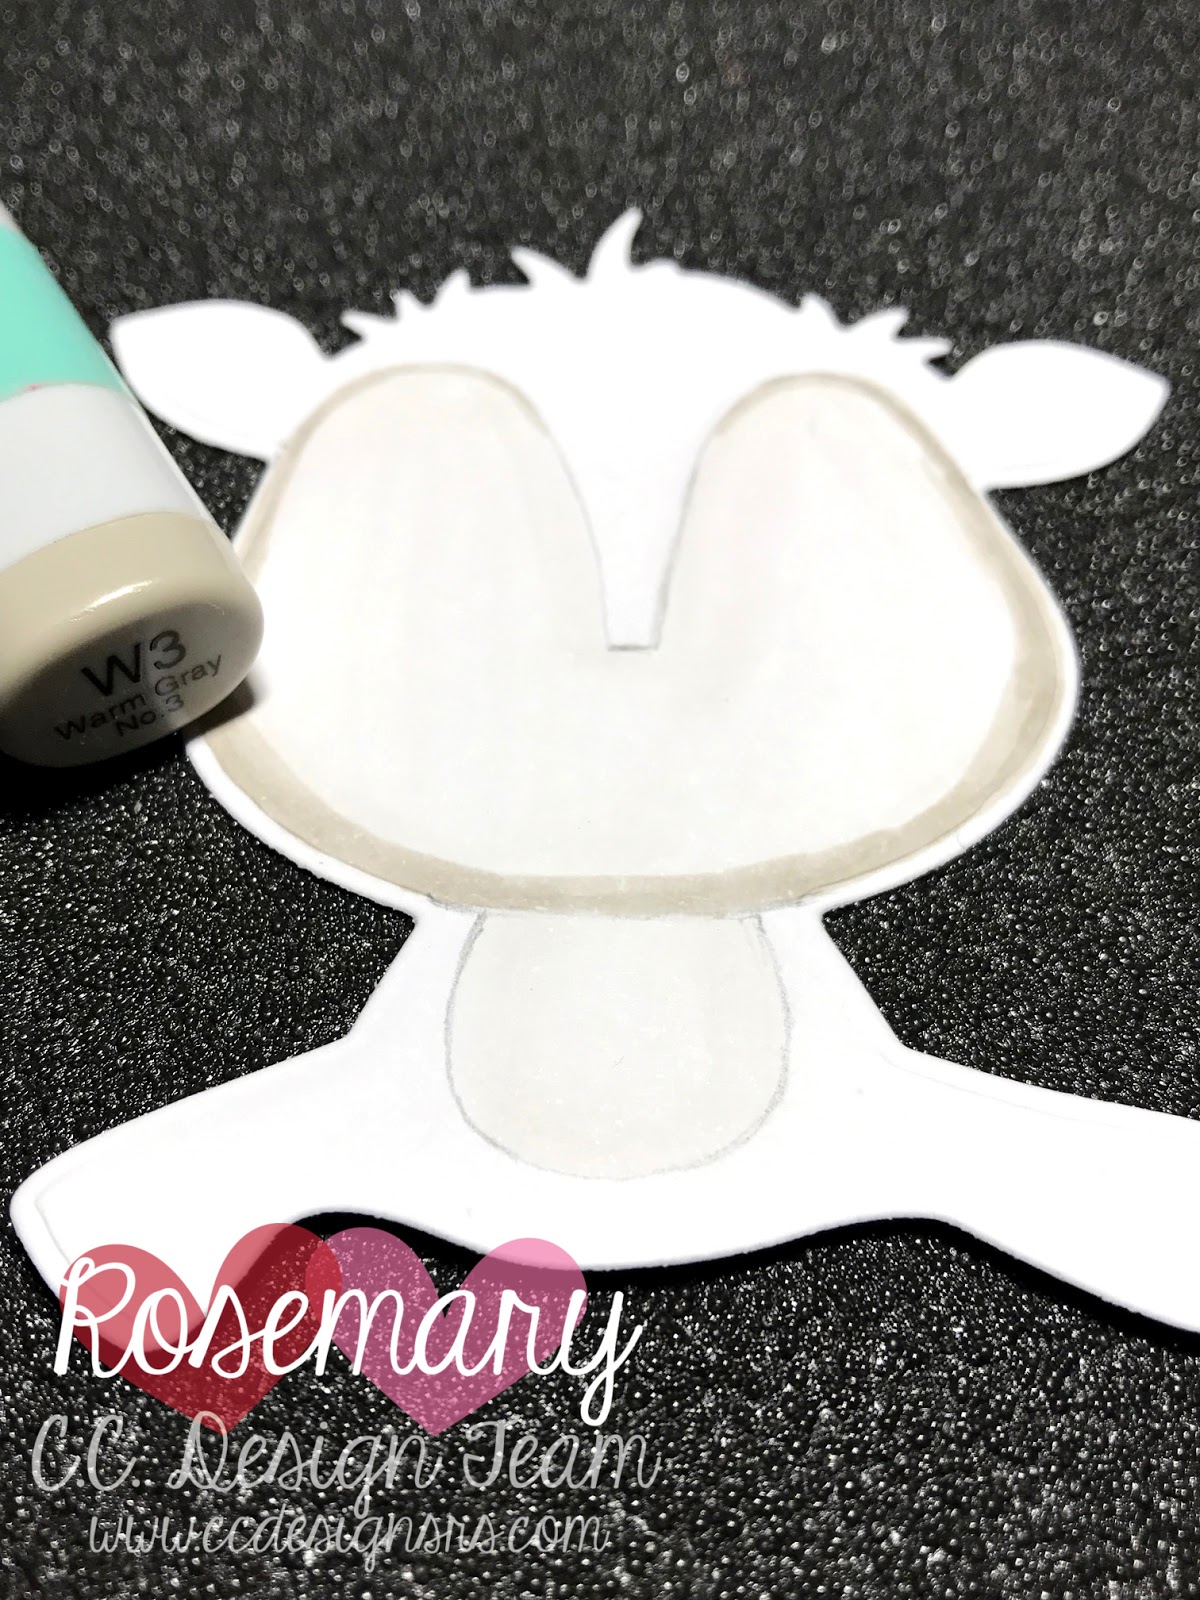
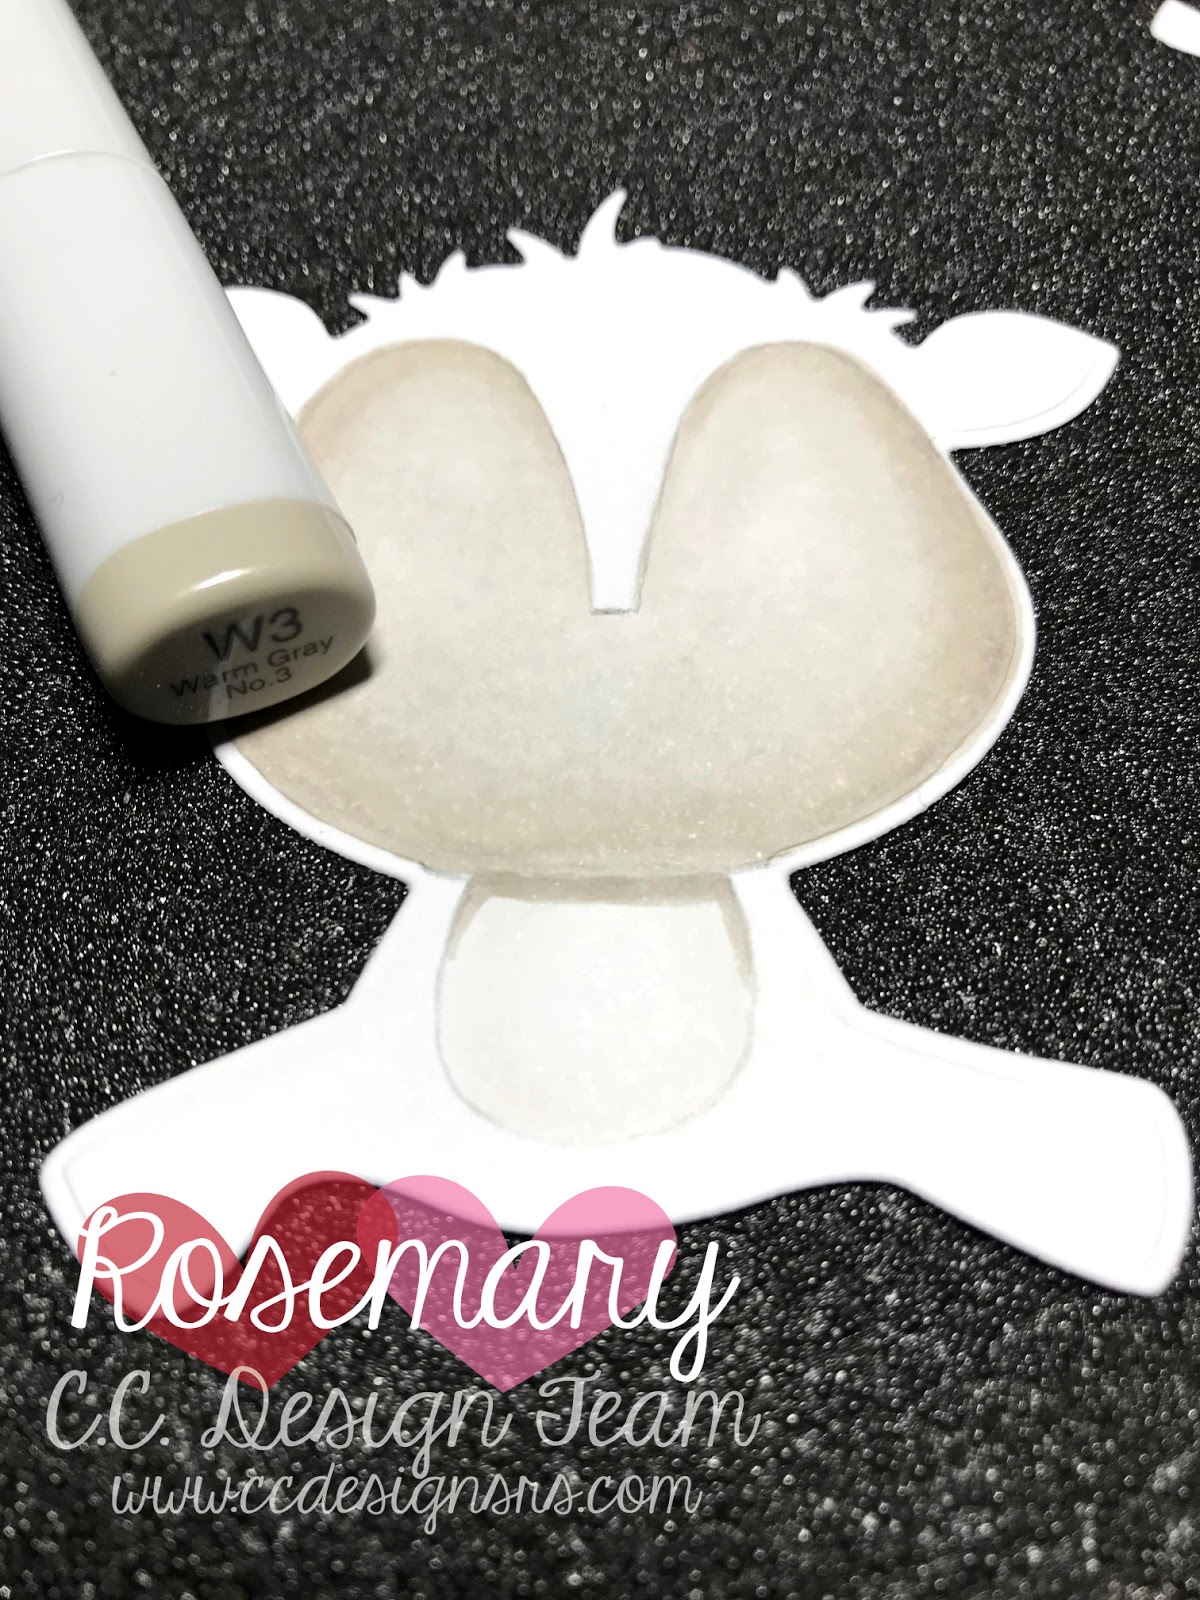
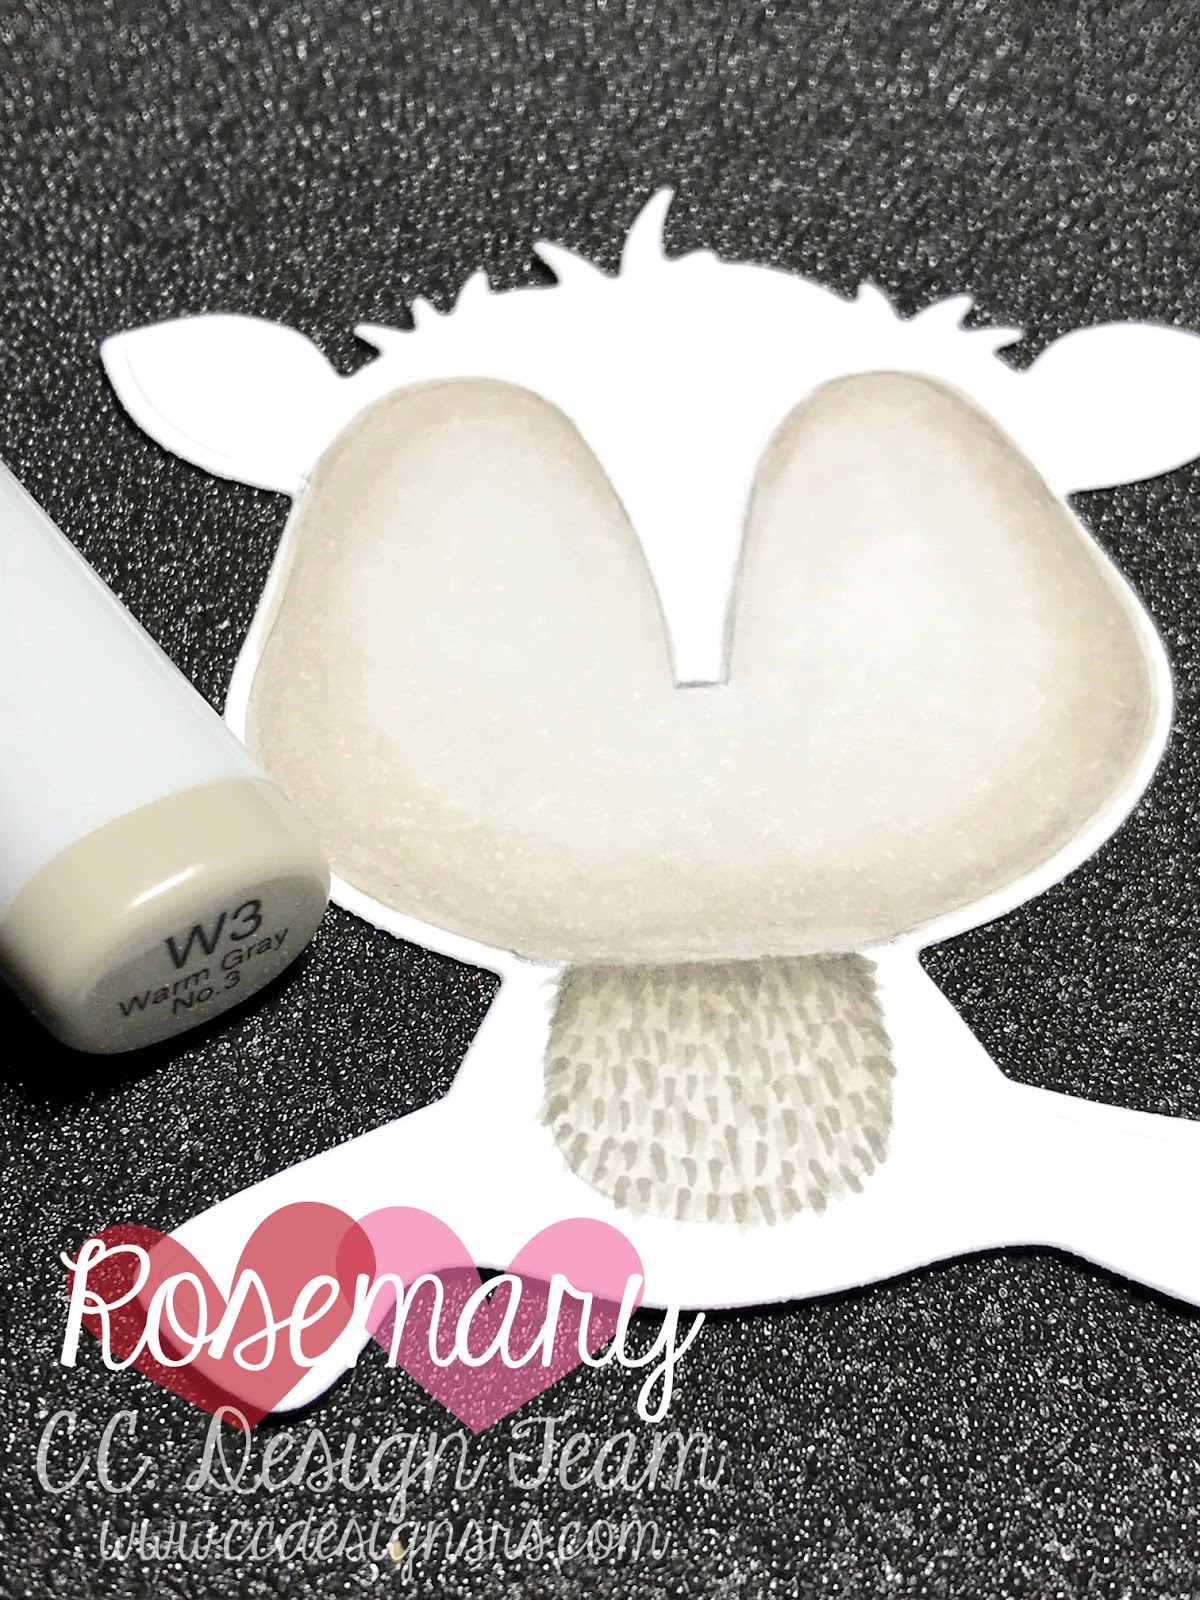
Step 4: I added W3 around the bottom and side edges of the face.
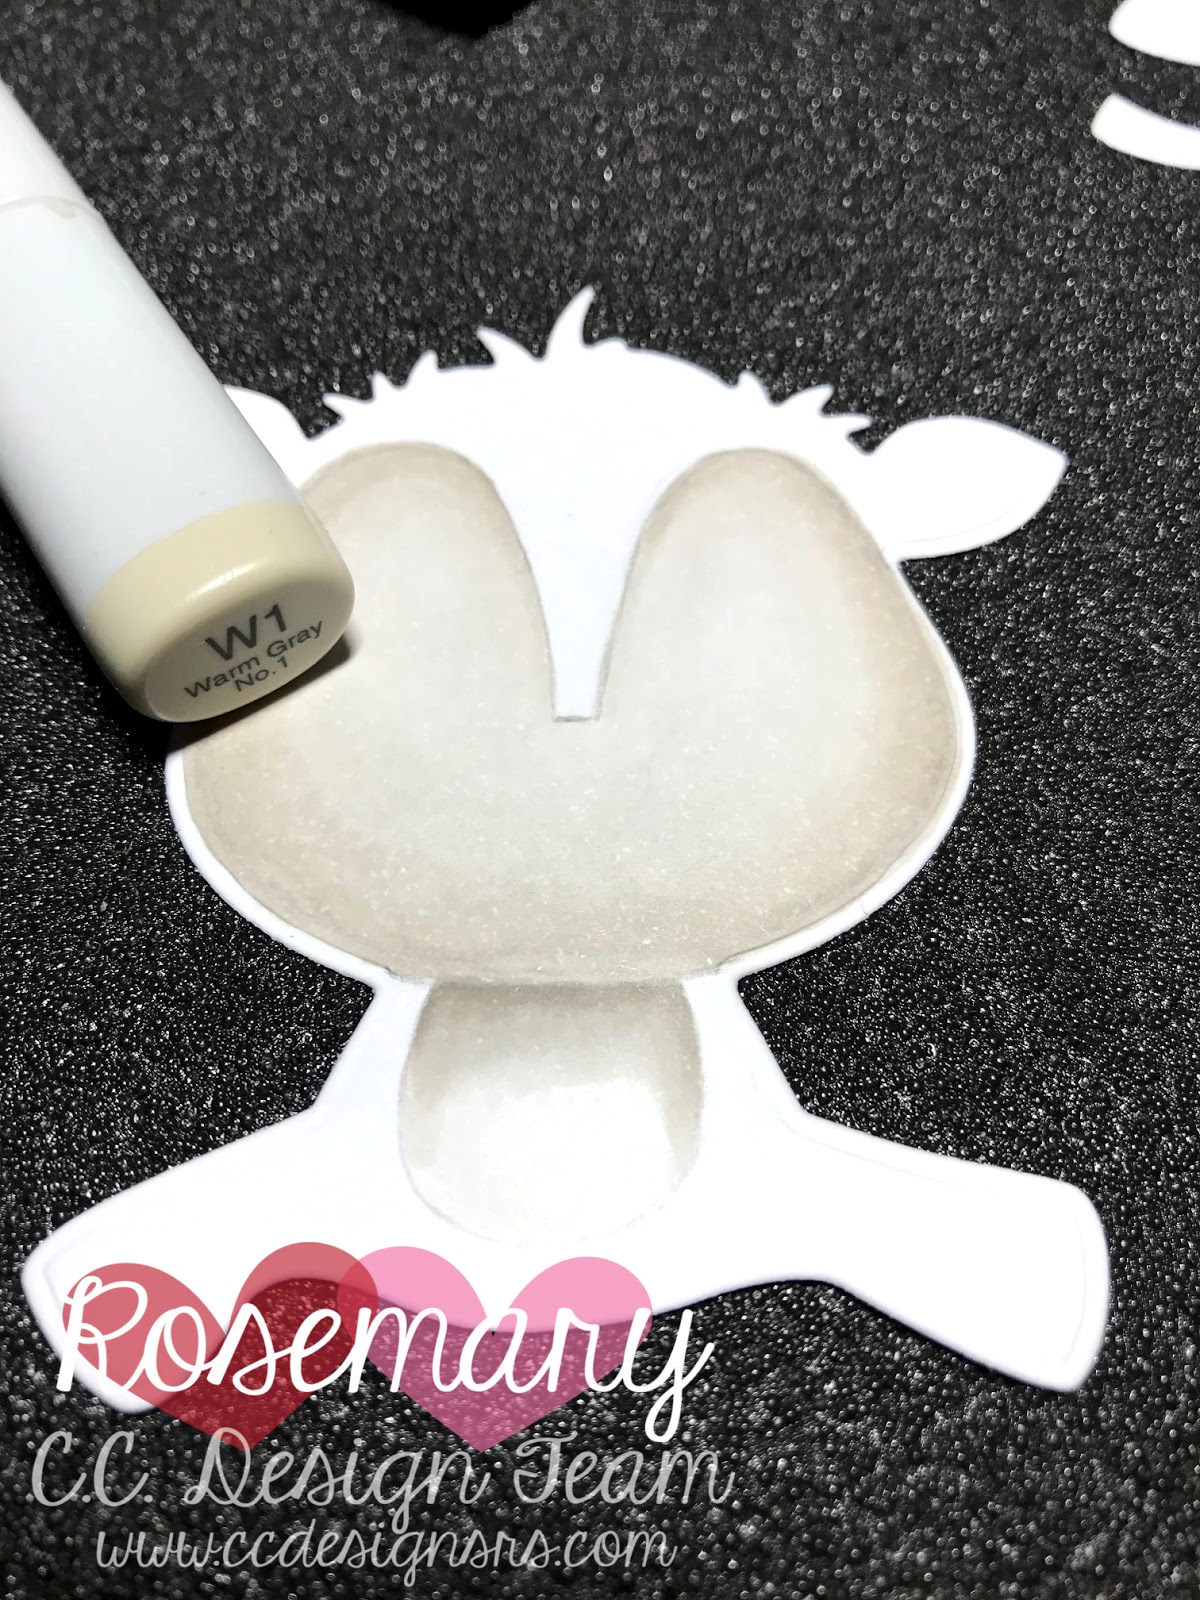
Step 5: I blended W1 towards the center, expanding the shaded area towards the middle.
Step 6: I added W0 over the center of the face and blended towards the W1 layer.
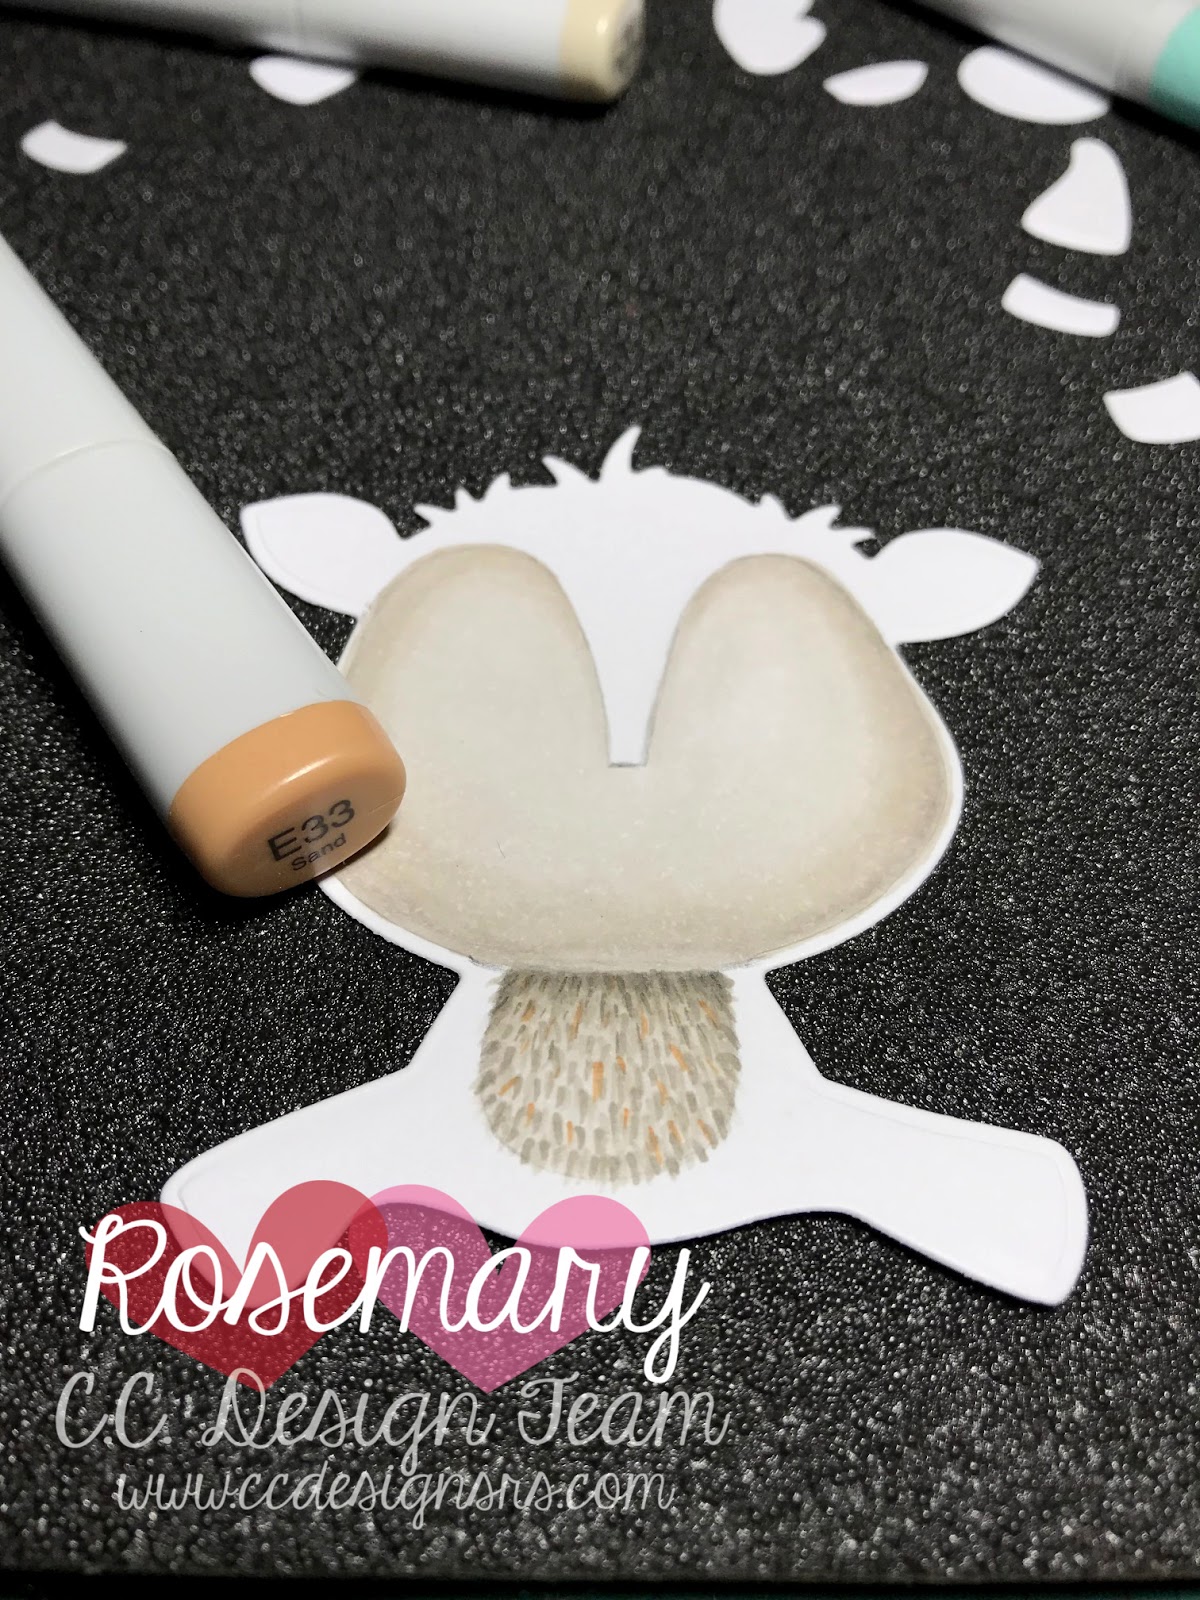
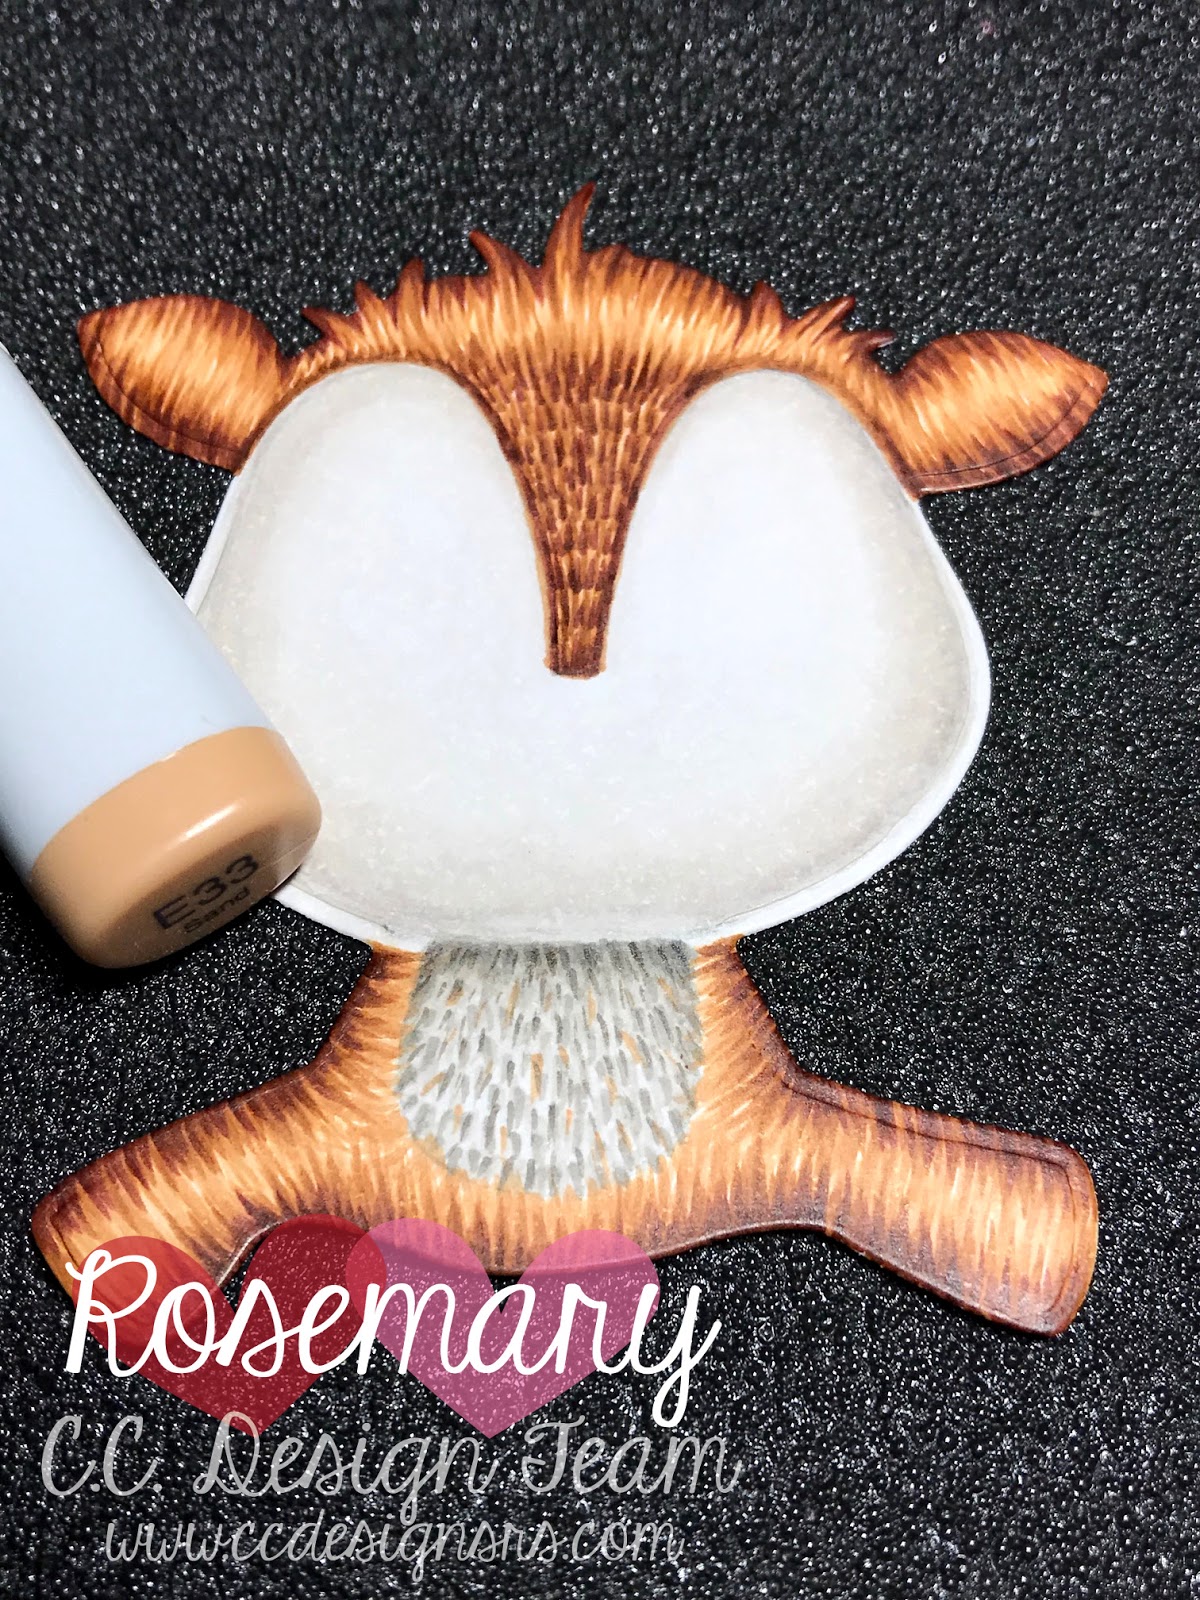
Step 7: Next, I added W3 on the stomach area and placed the darker color under the chin.
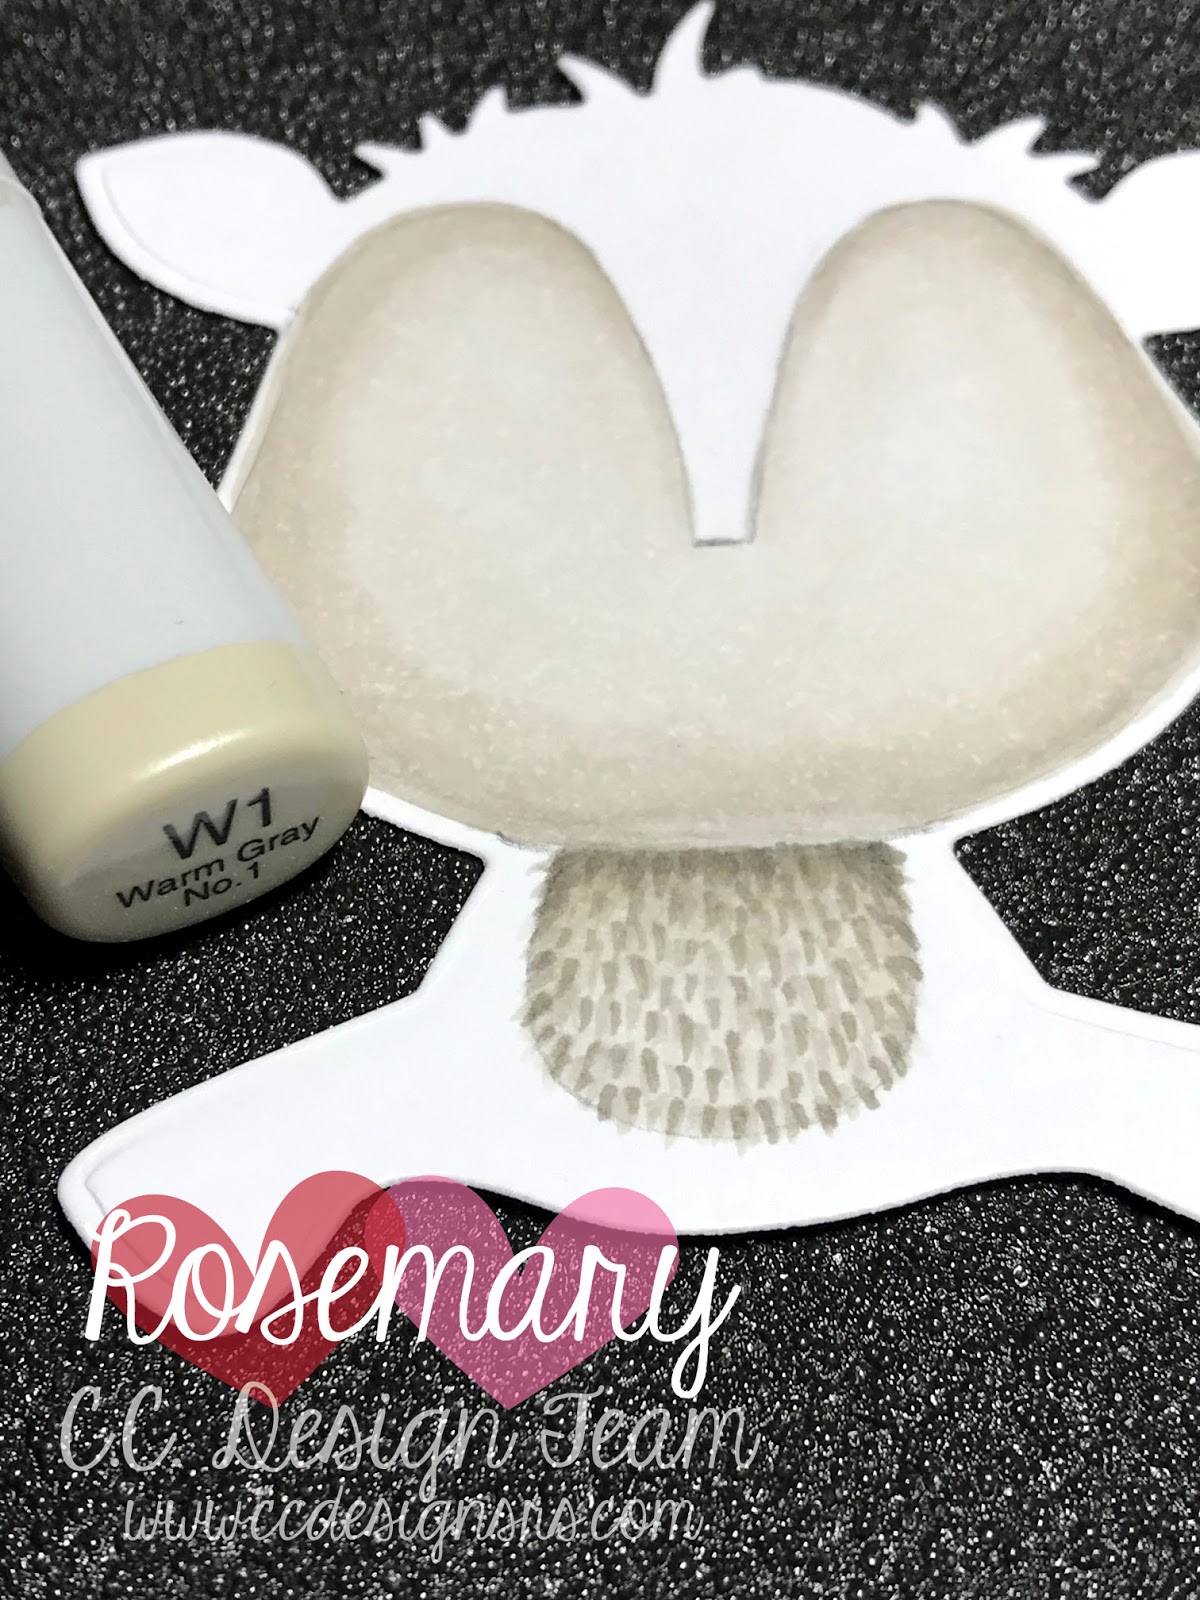
Step 8: I added W1 next and extended the shaded area to the center.
Step 9: I added W0 to the bottom and center of the stomach, and blended it towards the W1 layer.
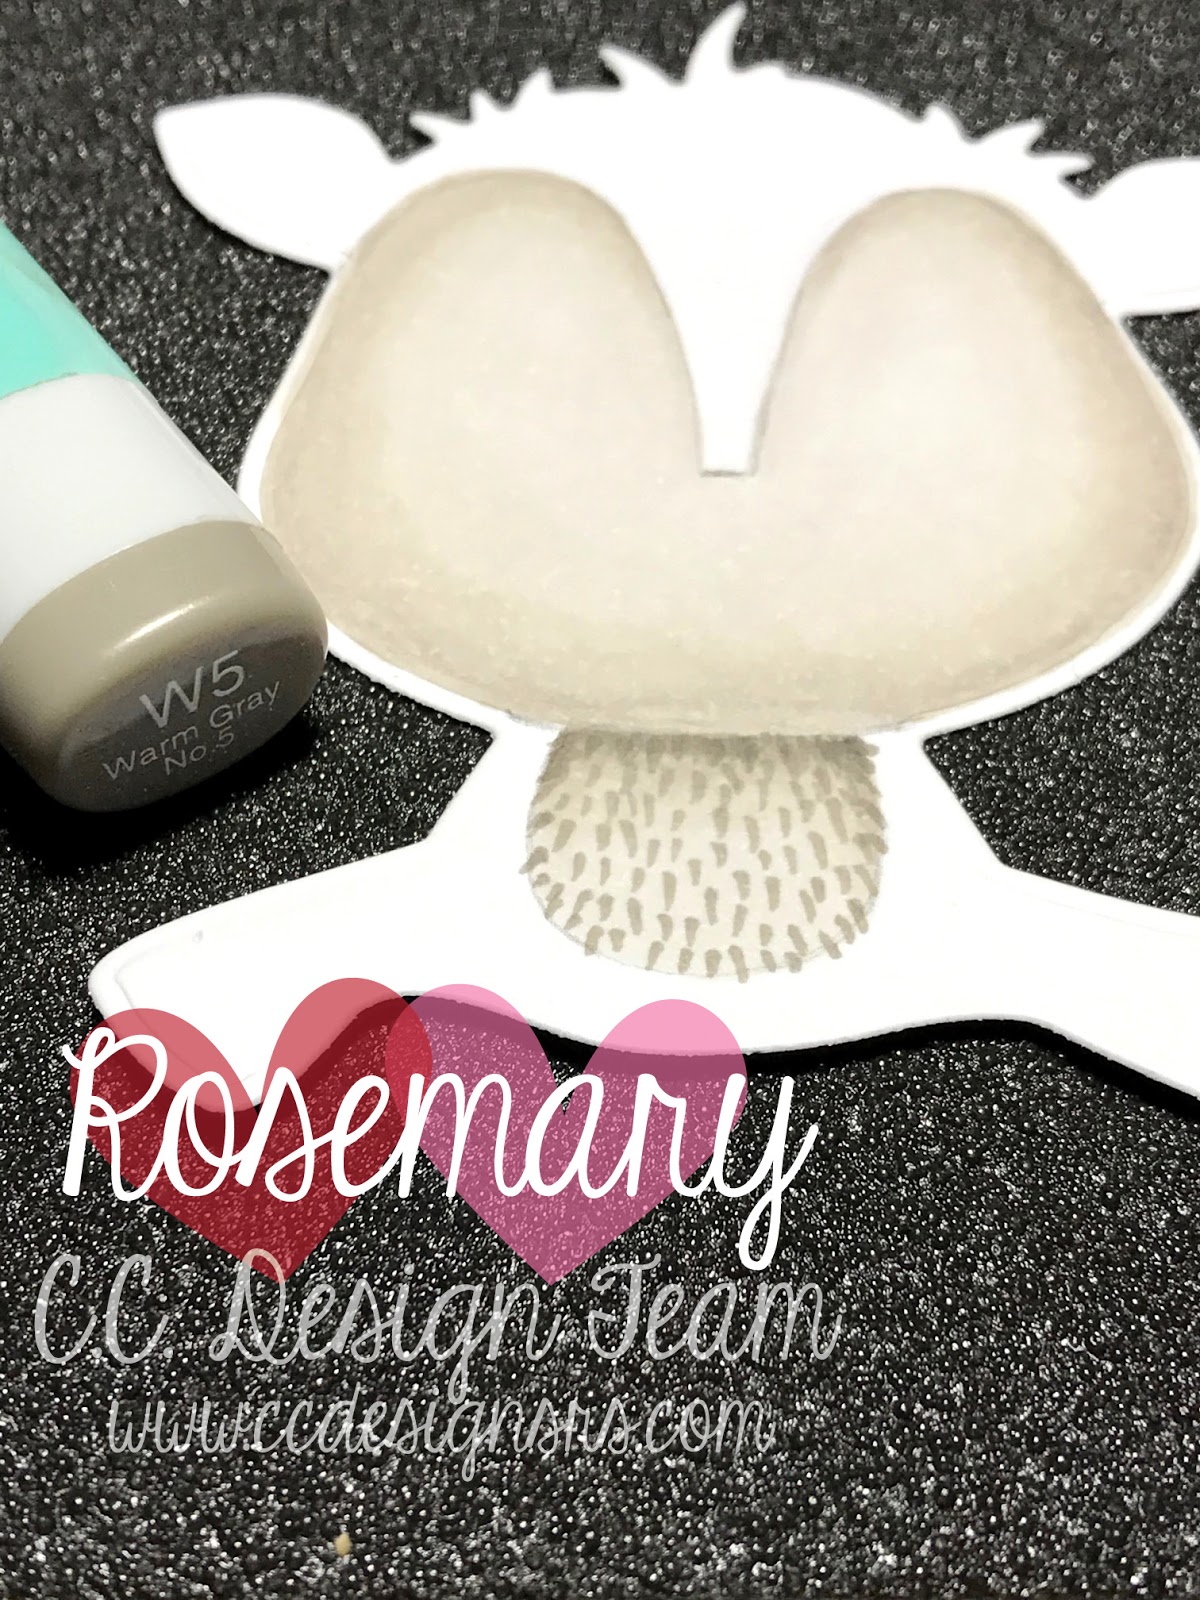
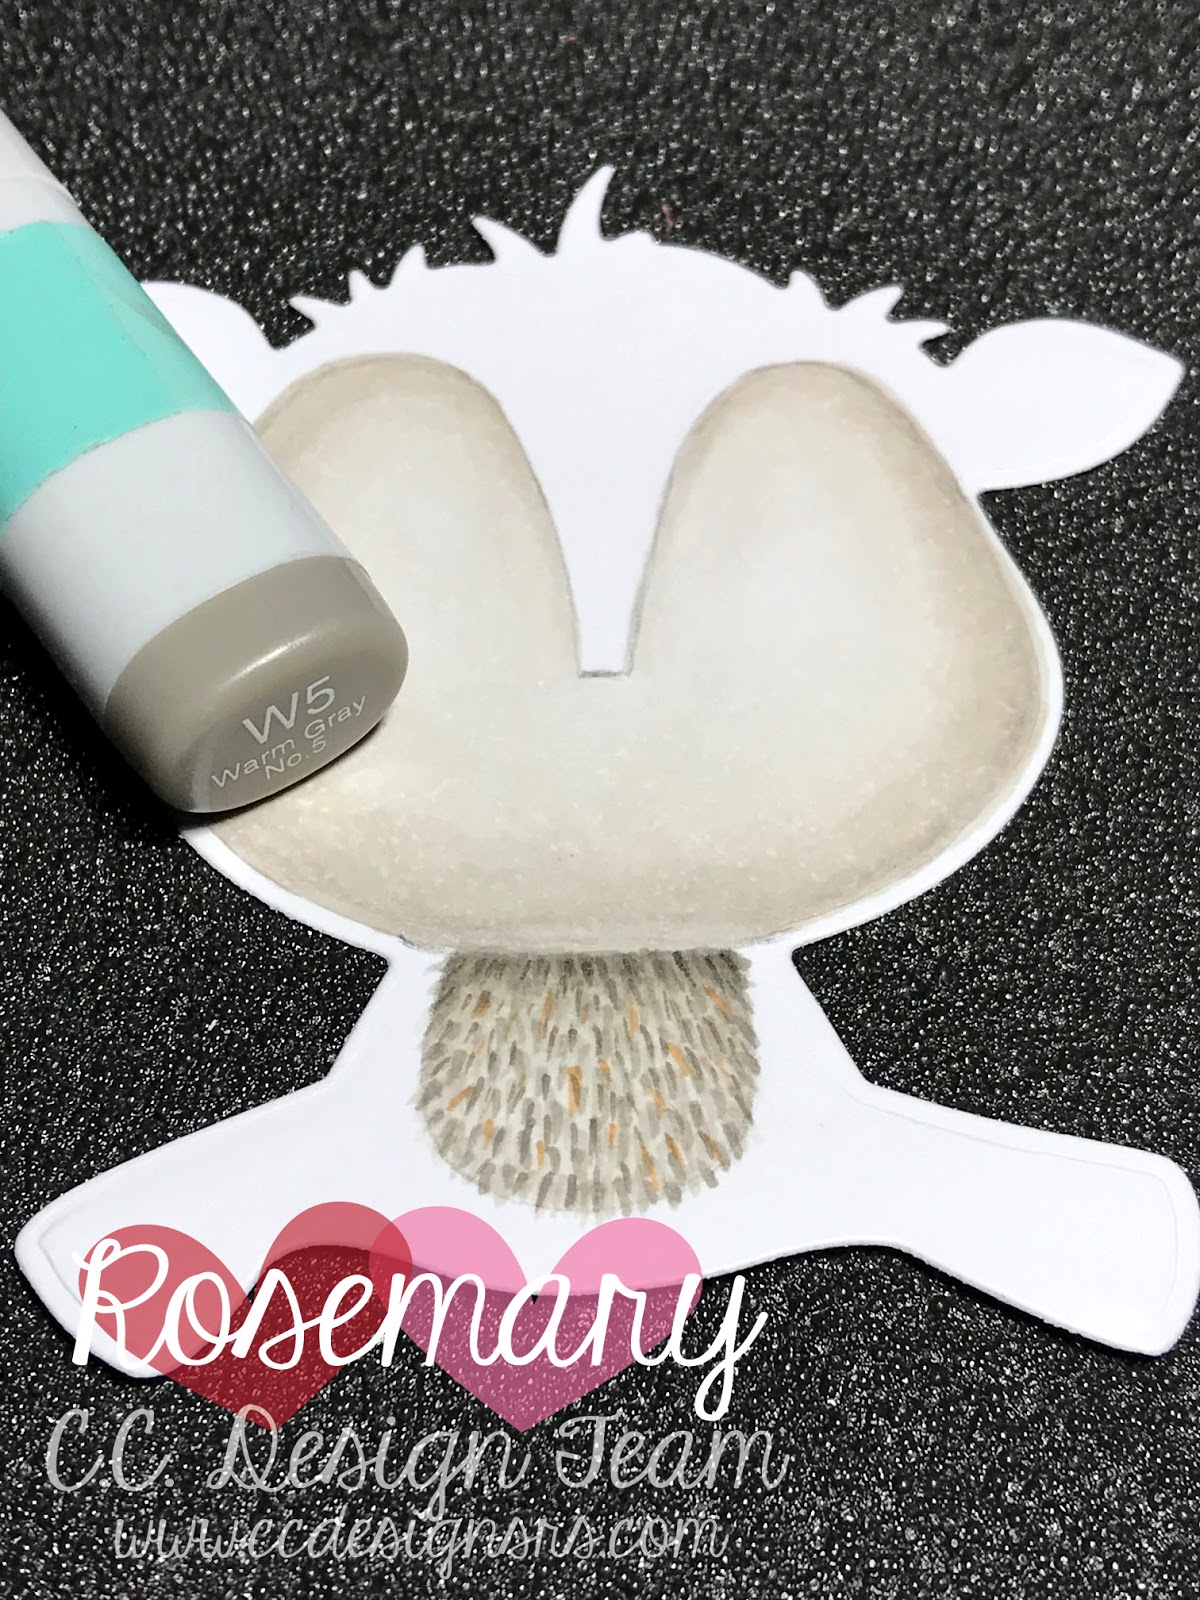
Step 10: To give the stomach area the look of fur, I took W5 and added little flicks.
Step 11: Next, I added short flicks with W3.
Step 12: Then I added more short flicks with W1.
Step 13: To break up the W color a little, I added a few flicks of E33.
Step 14: Since the lighter colors faded the darker flicks a little, I added a few more thin flicks of W5.
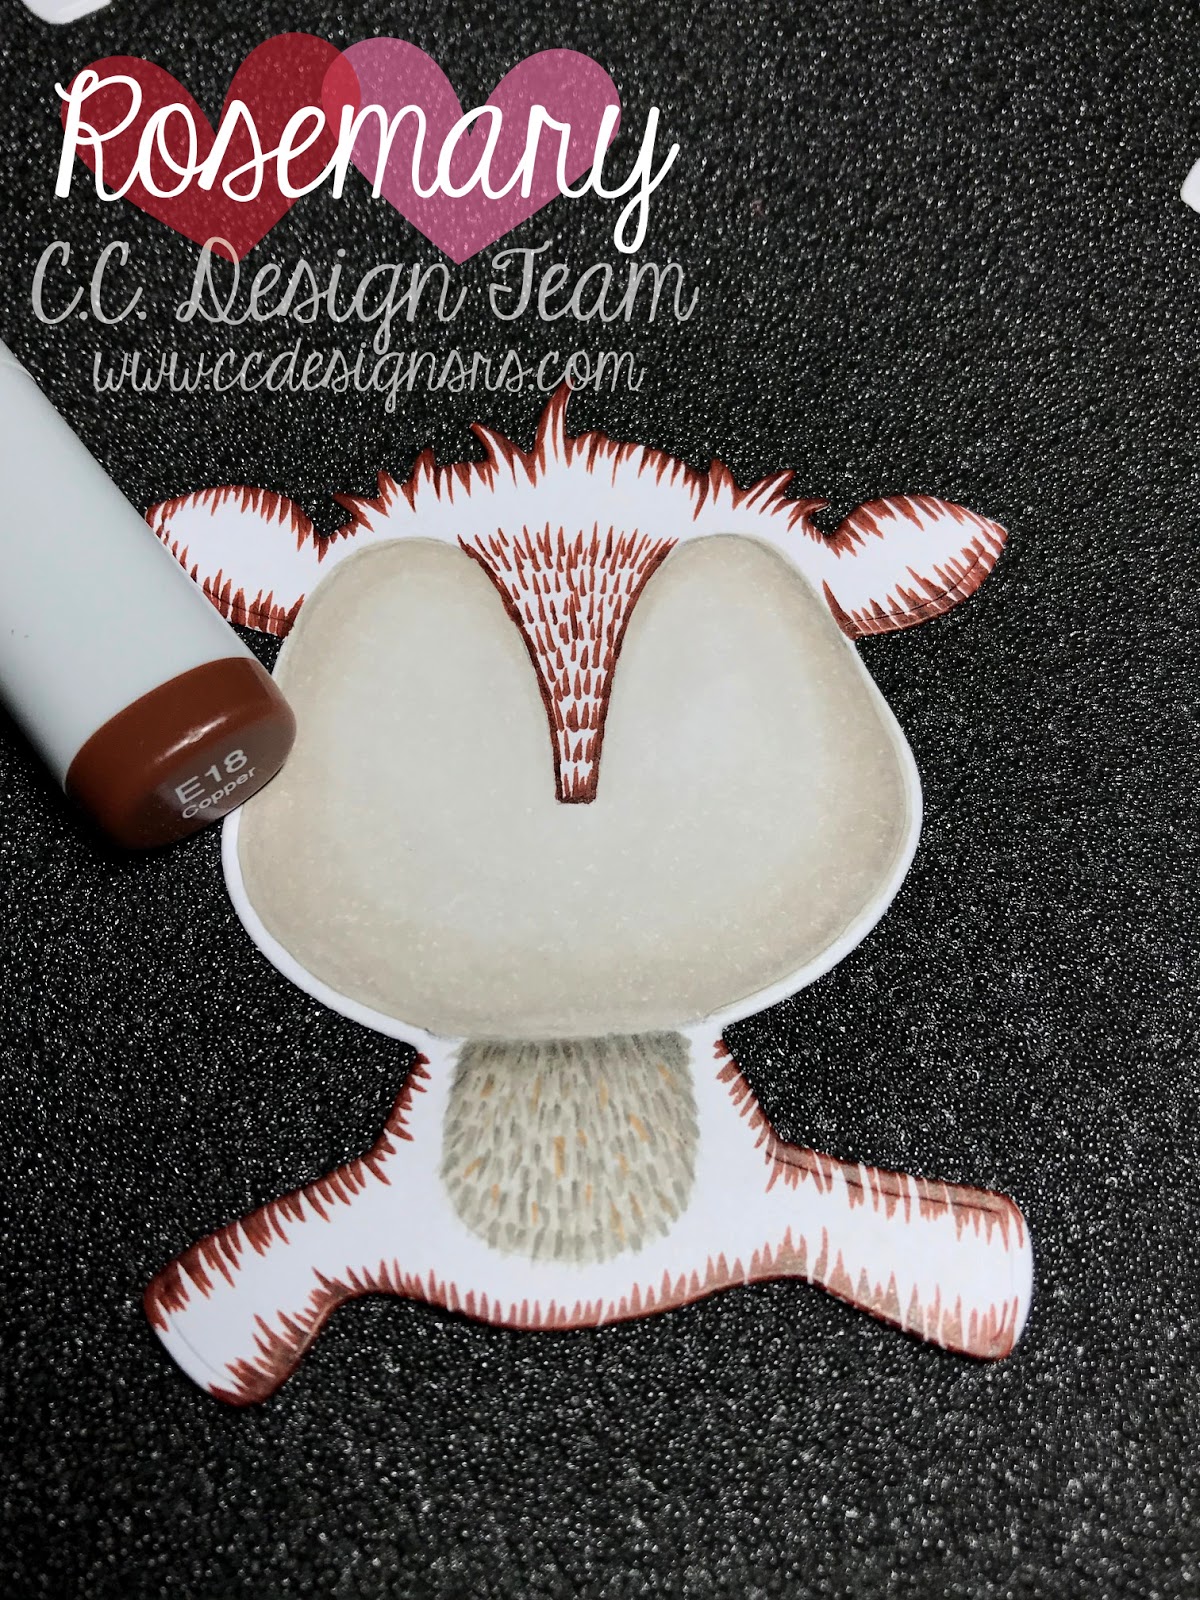
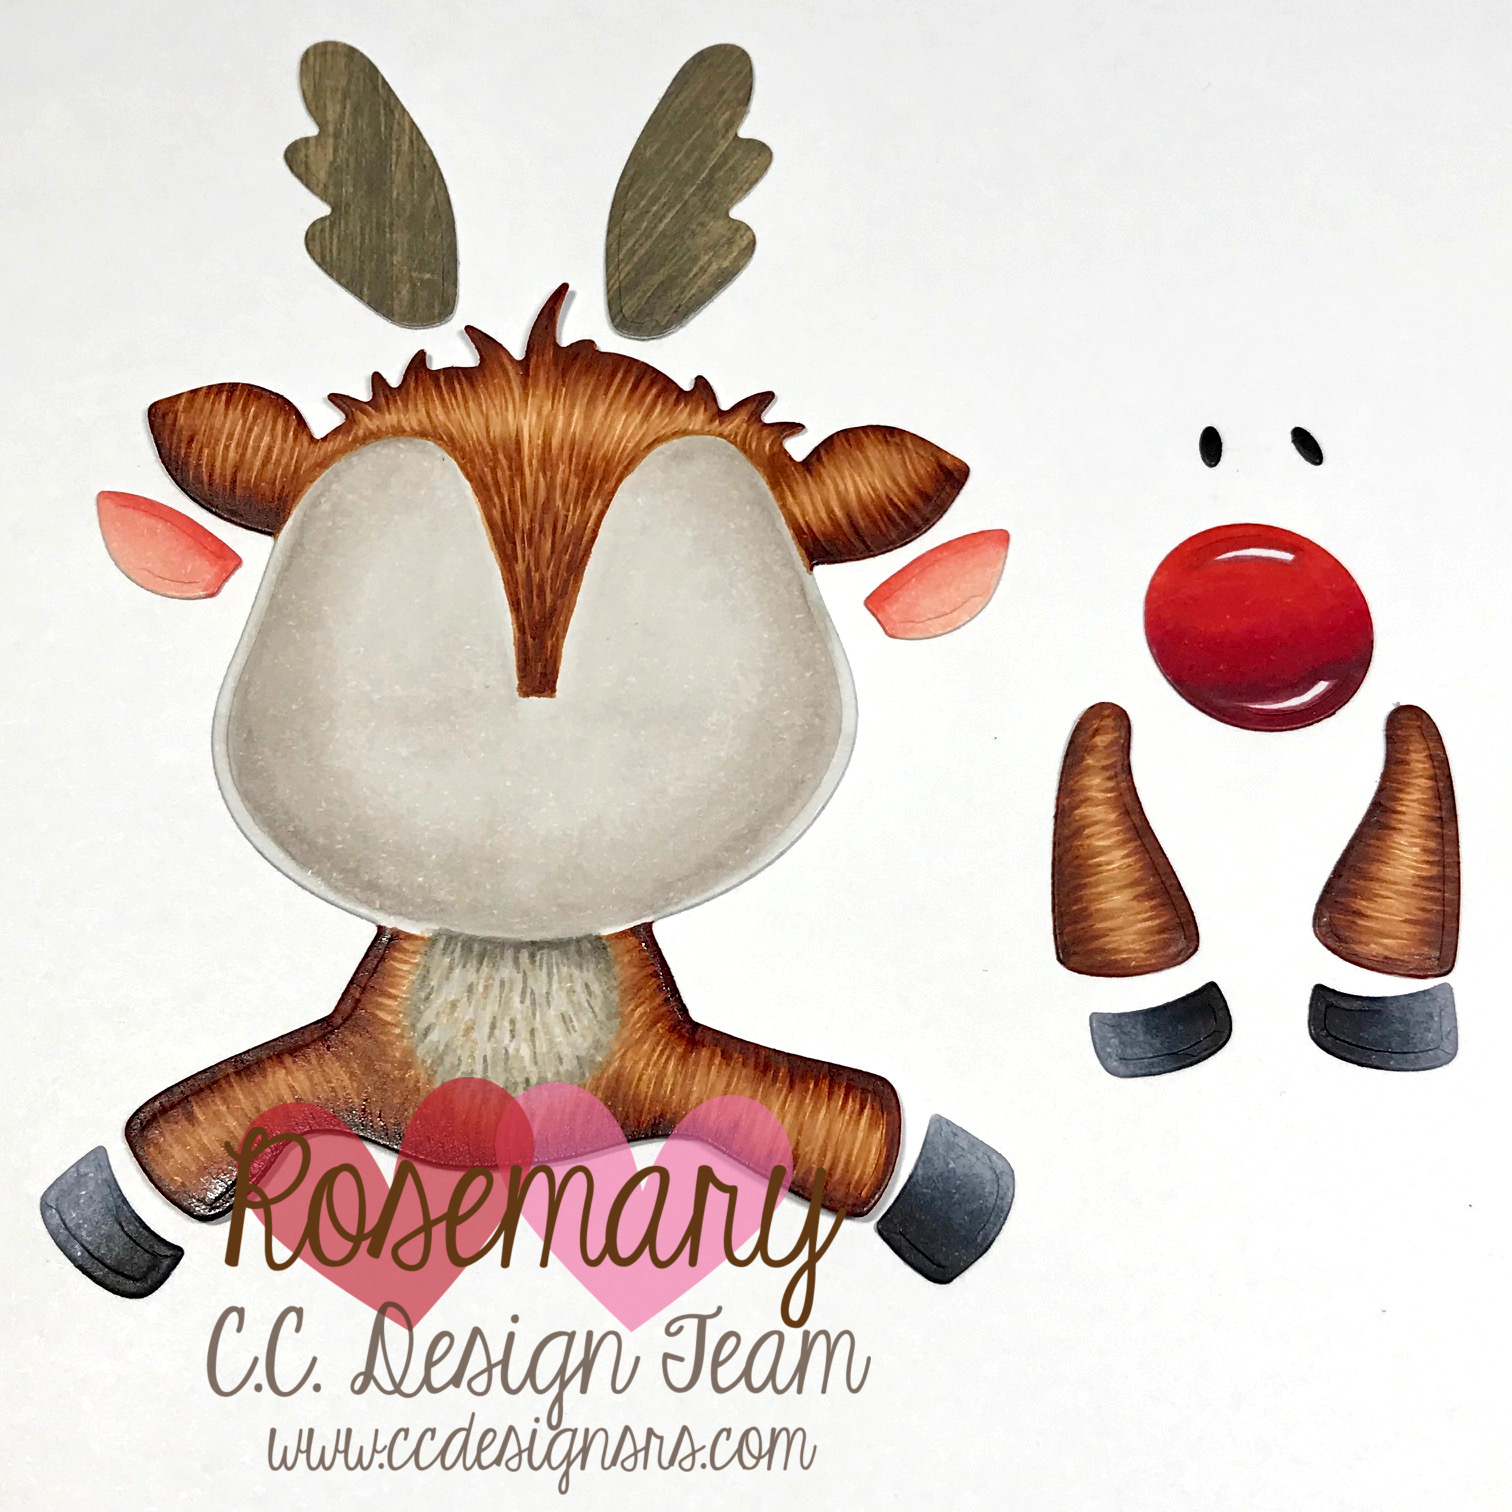
Step 15: Next, I started to add the body fur by added flicks with E18 around the edges of the die and short flicks at the bridge of the nose.
Step 16: I extended the line of the flicks using E37.

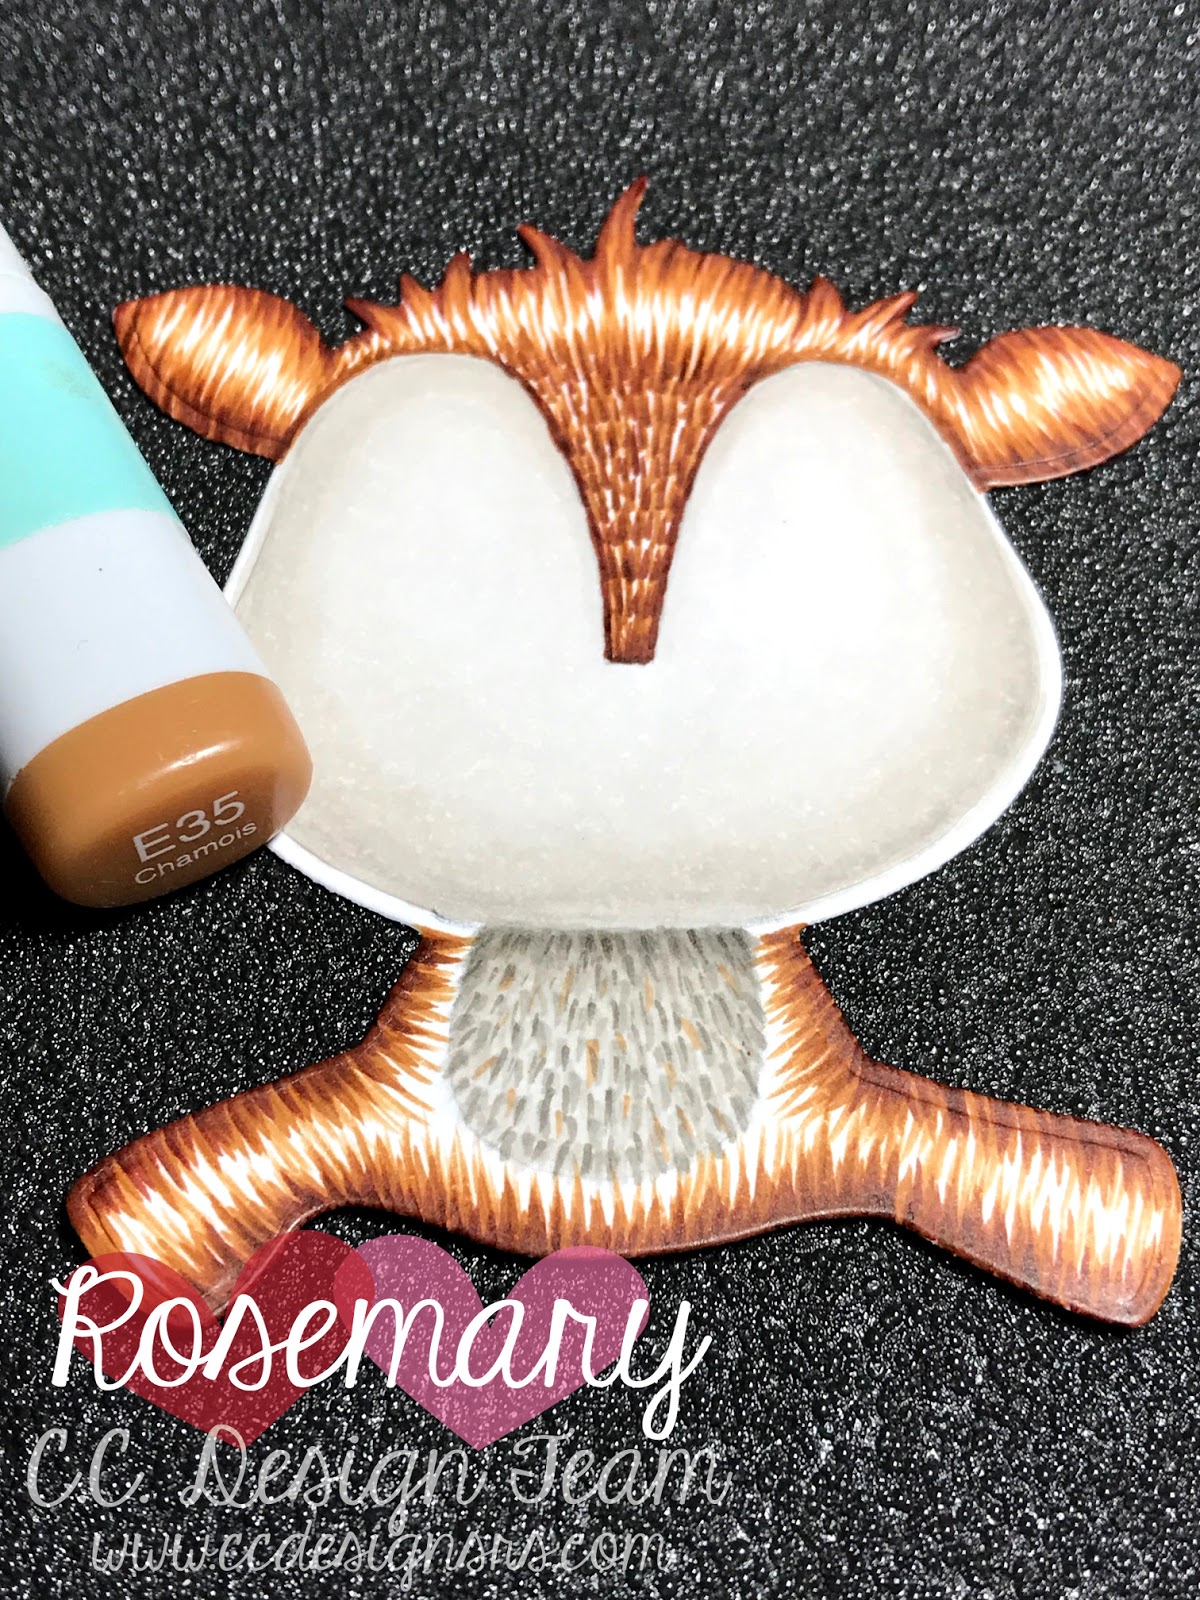
Step 17: To fill in the white areas even more, I added thin, longer flicks using E35.
Step 18: I finished the fur by filling in the white areas with E33 using a flicking motion over the current lines.
This picture shows all the pieces colored in. Instead of coloring the antlers, I re-cut those pieces from decorative paper.
Copics:
Light color of face: W0, W1, W3
Stomach: W0, W1, W3, W5, E33
Brown Fur: E33, E35, E37, E18
Pink: R20, R22
Red: R24, R27, R29, R56, R59
Black: C5, C8, C10
Antlers: Decorative Paper
Eyes: Black Cardstock
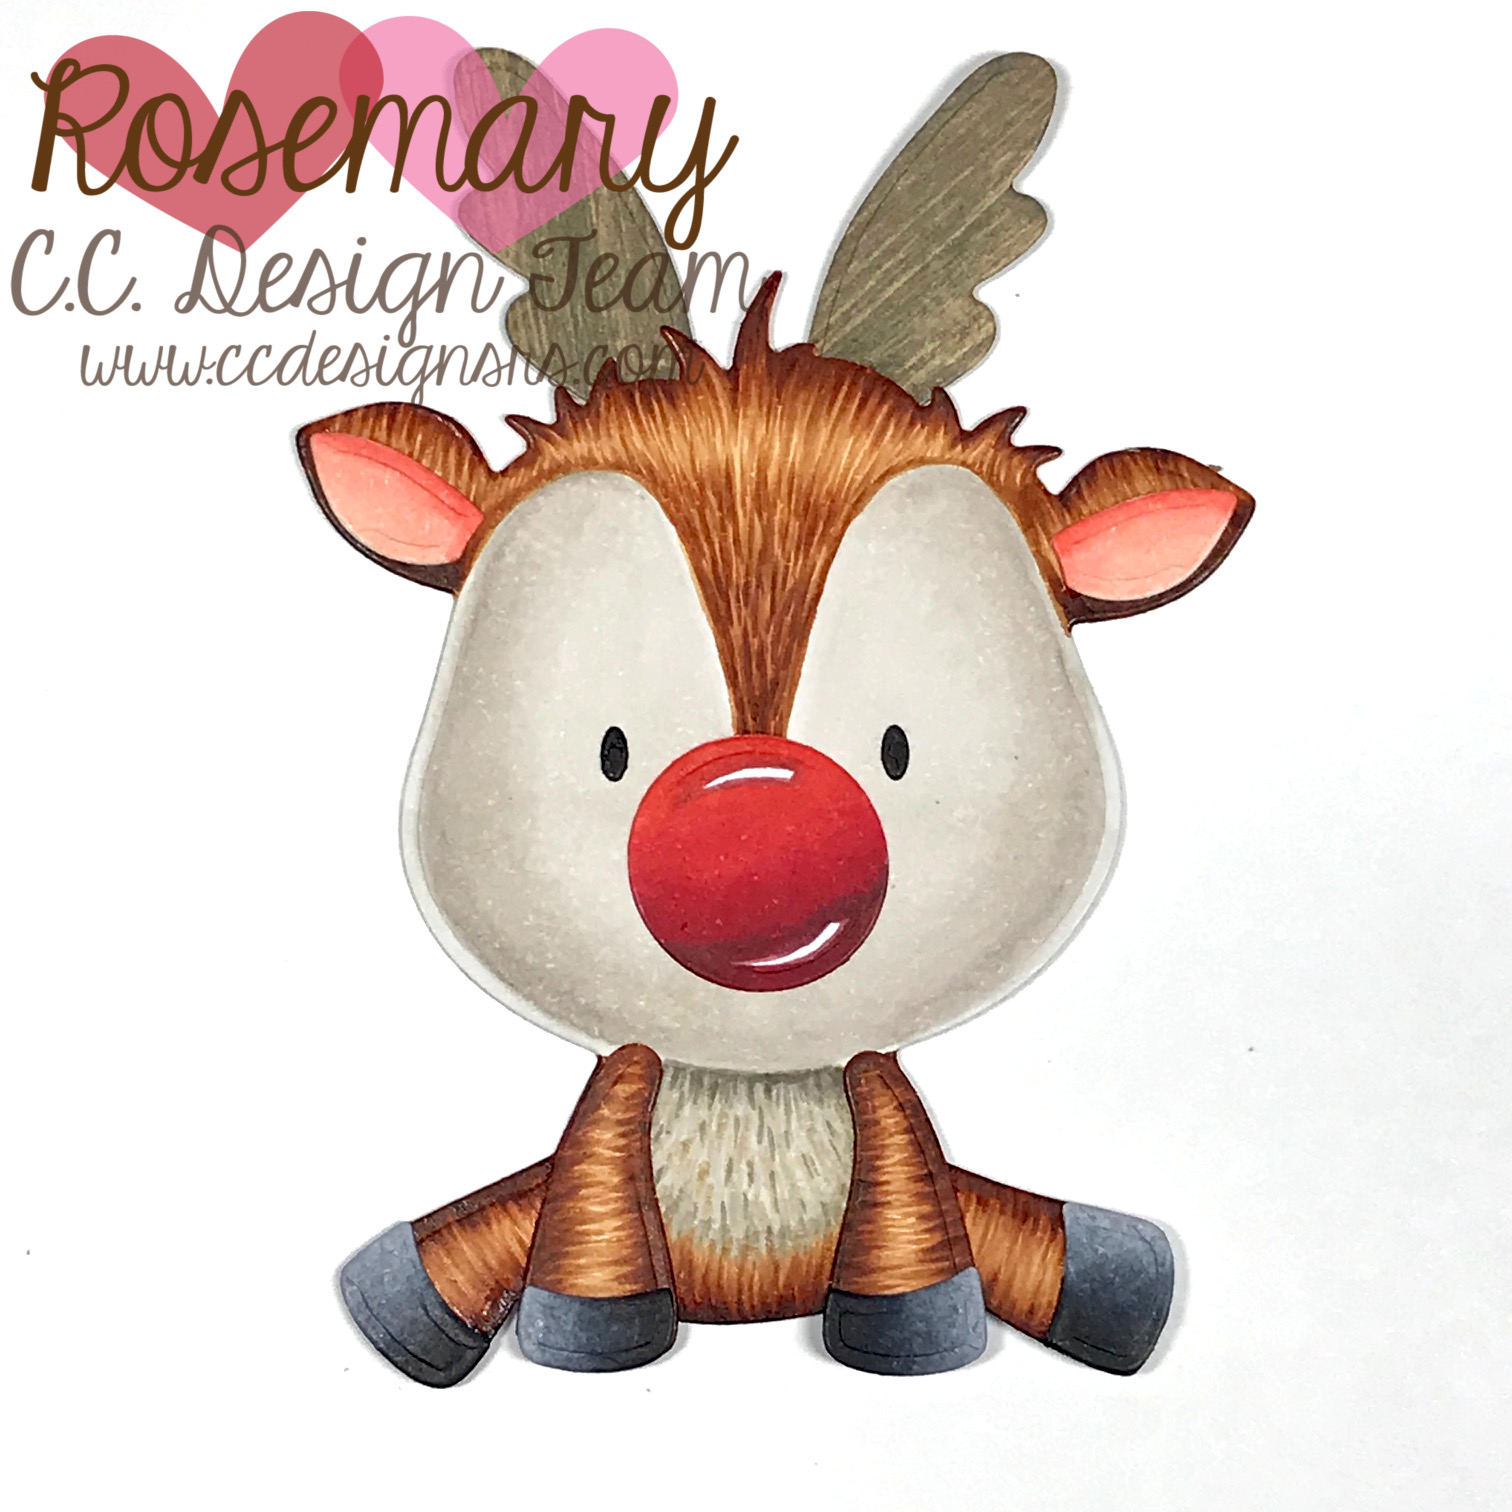
I hope this inspires you to color your die-cuts using your markers or pencils. It definitely gives your finished piece more dimension and texture. Be sure to head over to the C.C. Designs Store to grab your Make A Reindeer Die. He's definitely a cutie!
Hugs,
Rosie
TAGS:
vikas On
Hello everyone!
I just came across this drawing video. I thought you might like it so I’m sharing this.hope you all also find it useful
#kidsdrawing #HowTodrawLaptops #HowTodrawMachine #HowTodrawVacum cleaner #DrawingForBeginners #DrawingForKids #kidsdrawingTutorial
https://www.youtube.com/watch?v=NGkqkHFXjqU
Bonnie Kohane On
Rosemary, what a talented person you are! I love this and you’ve inspired me! Thank you!
Holly Flores On
OMGosh so fabulous, thank you for the tutorial